


" Free Crazy Christmas Elf Hat Pattern©"
By Connie Hughes Designs©
This hat is so cute on and the bells have a very soft sound...
so no headaches here!
By Connie Hughes Designs©
This hat is so cute on and the bells have a very soft sound...
so no headaches here!
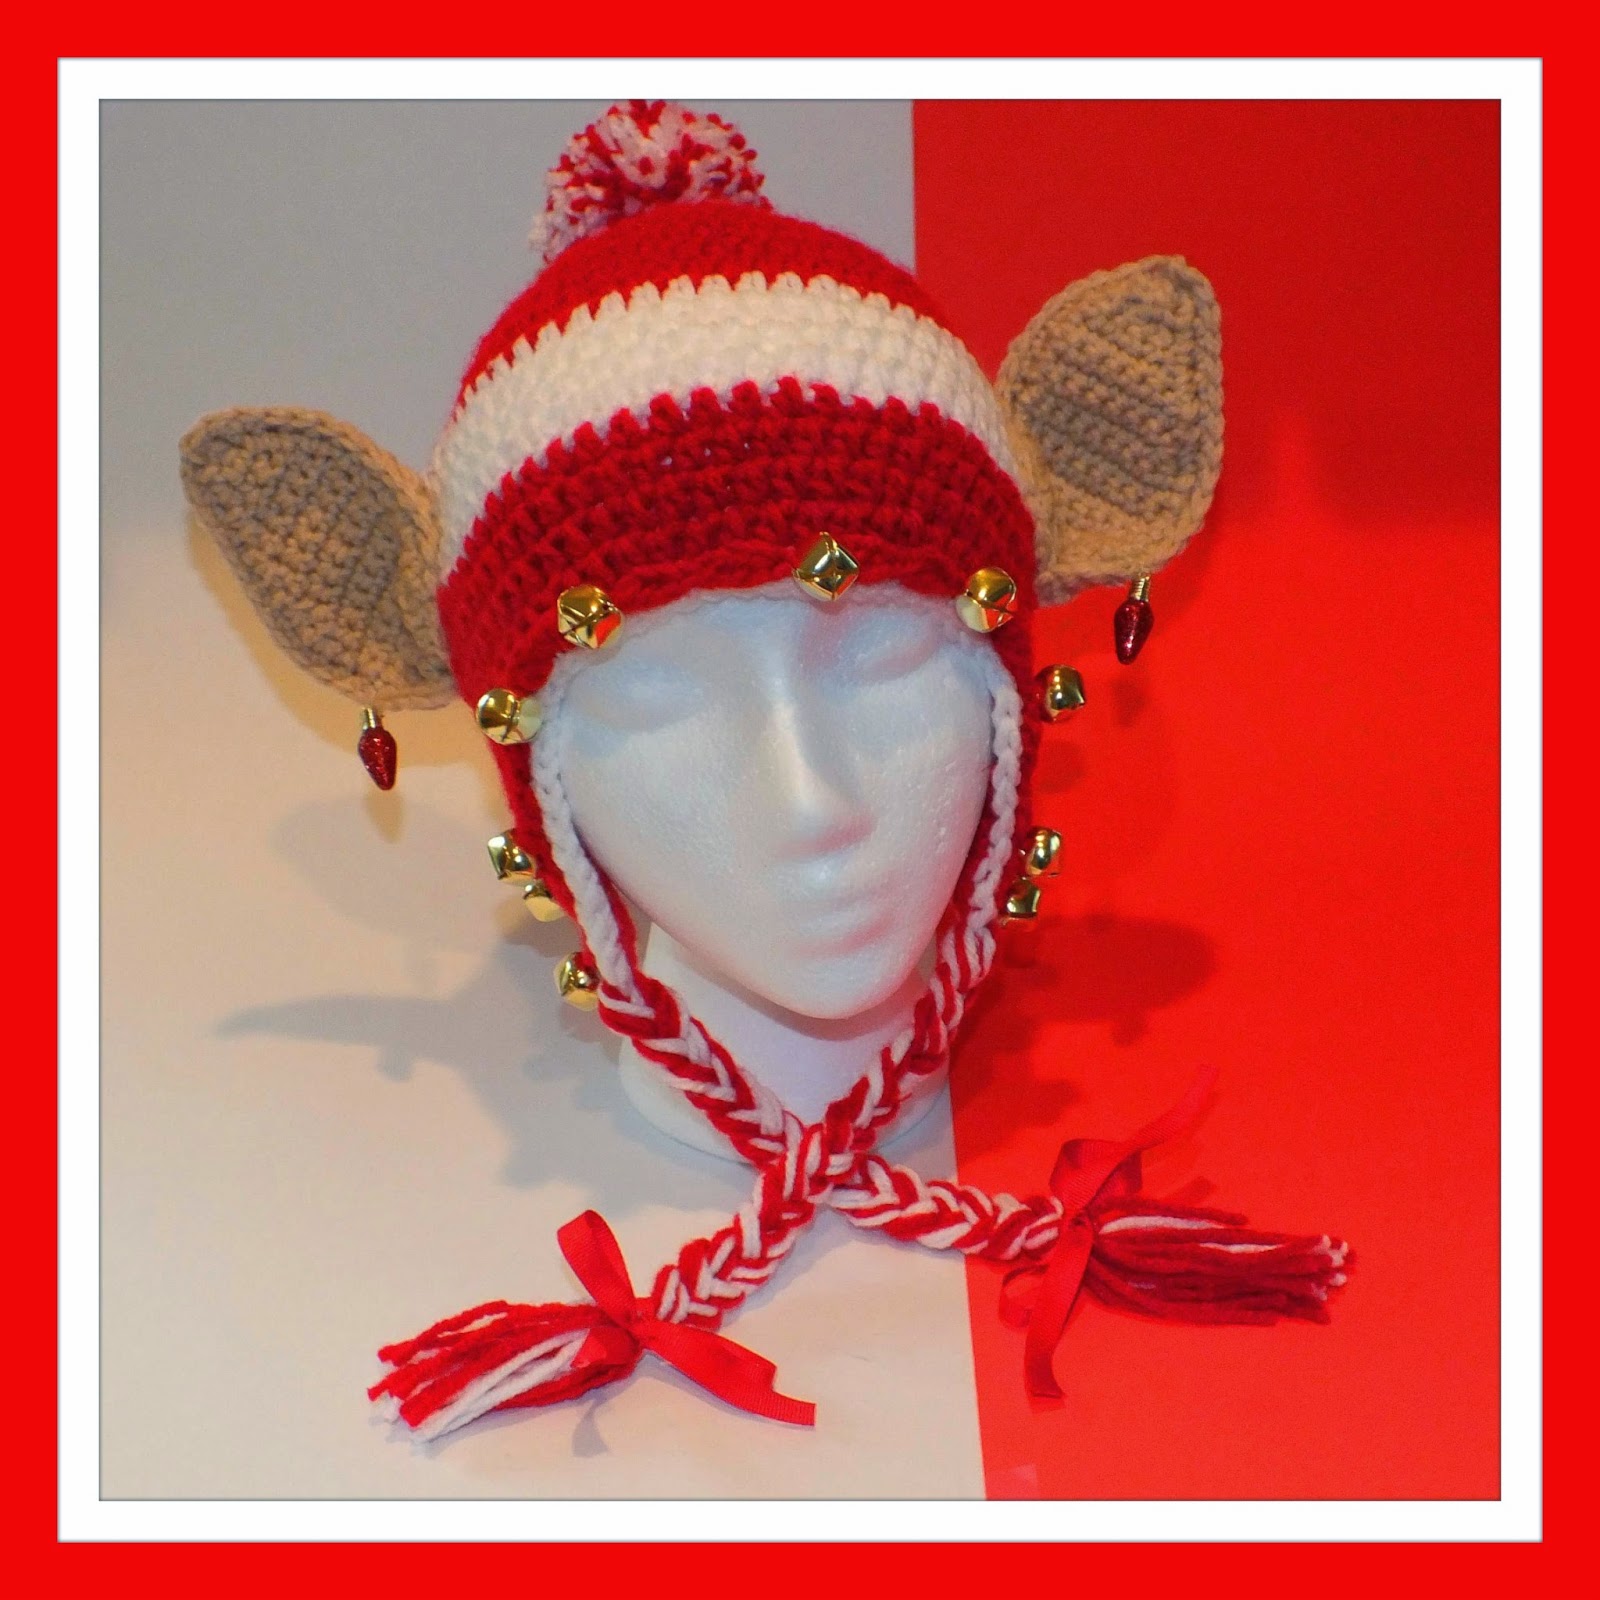
The hat without the Bells


To make the Hat: with Cherry Red & White Yarn J Hook
With Cherry Red
Ch2
Row 1. Wk 9hdc in the 2nd st from the hook, do not join-9sts. (Use a stitch marker)
Row 2. 2hdc in each st around-18sts.
Row 3. 1hdc in the first st, 2hdc in the next, around-27sts.
Row 4. 1hdc in 2 sts, 2hdc in the next, around-36sts.
Row 5. 1hdc in the next 3 sts, 2hdc in the next, around-45sts.
Row 6. 1hdc in 4 sts, 2hdc in the next, around-54sts.
Row 7. 1hdc in each st around-54sts.With Cherry Red
Ch2
Row 1. Wk 9hdc in the 2nd st from the hook, do not join-9sts. (Use a stitch marker)
Row 2. 2hdc in each st around-18sts.
Row 3. 1hdc in the first st, 2hdc in the next, around-27sts.
Row 4. 1hdc in 2 sts, 2hdc in the next, around-36sts.
Row 5. 1hdc in the next 3 sts, 2hdc in the next, around-45sts.
Row 6. 1hdc in 4 sts, 2hdc in the next, around-54sts.
(Stop here for toddler, continue around/change to white yarn after 8th row, work 4 rows/change back to red. Continue around until hat measures 7inches).
To make the hat child size:
Work to 63sts, then continue until the hat measures 7.5inches.
If the ear flaps are to small work 12sts and work them the same way.
To make the Ear Flaps: with Cherry Red & J Hook (make 2)
Row 1. Wk 1sc in the next 10 sts, ch1 & turn-10sts.
Row 2. dec 1, 1sc in 6sts, dec 1, ch1 & turn-8sts.
Row 3. 1sc in the next 8sts, ch1 & turn.
Row4. dec 1, 1sc in 4 sts, dec 1,ch1 & turn-6sts.
Row 5. 1sc in 6sts, ch1 & turn.
Row 6. dec 1, 1sc in 2sts, dec 1, ch1 & turn-4sts.
Row 7. 1sc in 4sts, ch1 & turn.
Row 8. dec 1 2x, ch1 & turn, ch1 & turn.
Row 9. dec 1 and FO.
Change to white yarn and wk 1sc all the way around the hat & both ear flaps.
To make the Elf Ears: with Buff Yarn & G Hook (make 4)

Row 1. 1sc in each st, ch1 & turn-9sts.
Rows 2-7. repeat row 1-9st.
Row 8. dec1, 1sc in 7, ch1 & turn-8sts.
Row 9. 1sc in 6, dec1, ch1 & turn-7sts.
Row 10. 1sc in 7sts, ch1 & turn.
Row 11. 1sc in 5sts, dec1, ch1 & turn-6sts.
Row 12. 1sc in 6sts, ch1 & turn.
Row 13. 1sc in 4, dec1, ch1 & turn-5sts.
Row 14. dec1, 1sc in 1, dec1, ch1 & turn-3sts.
Row 15. 1sc in 3,ch1 & turn.
Row 16. dec1, 1sc, ch1 & turn.
Row 17. dec1, ch1 and wk 1sc in each st, dec1 st as you go around the corners. Continue around the rest of the ear & FO the 1st ear.
Once you have 2 ears, put them together and wk 1sc around both.
With tan thread sew the ears in place.
Optional: sew on 1 Christmas Light button onto each ear.
To make the Pom-Pom: with Red & White yarn
Cut 1 piece of yarn about 7 or 8" long , lay it horizontal on top of a piece of cardboard about 3 or 4". With red & white yarn wrap both around cardboard about 80x and FO. Tie the horizontal piece of yarn around the bundle of yarn with a knot (you may need to do this several times to make it secure). Cut the yarn on the back side and continue trimming until you have a small ball. Sew the pom-pom on the top of the hat.
To put the Bells on:
You can sew the bells around the entire hat including the back if you want. I left about a 2" gap between each bell.

Or you can do what I did, I made a long trim piece and fastened the bells to that. This is how I made it: with Red yarn & G hook/.75 hook
Ch3, wk 1dc in the 3rd st from the hook, I took my bell and placed a .75mm hook inside the loop that's on the top of the bell.
Photo 1

Photo 2
I took my G hook off my yarn and placed my yarn over the .75 hook and pulled the red yarn through the loop that's on the bell.

Photo 3
Then I put my G hook back into place and ch3, wk 1dc in the 3rd st from hook, repeat with another ch3 and work 1dc in the 3rd st from the hook, put another bell in place and repeat this until it goes all the way around the hat. Sew it into place.

Photo 4
So it's ch3, 1dc, ch3, 1dc and put bell & repeat.
Make the braids and tie a piece of ribbon around the end of each one.

Now you're done with the CRAZY ELF HAT!
Thanks for Supporting Connie's Spot© Sponsors!
GroopDealz

BANANA REPUBLIC

Banana Republic Gifts for Her!


No comments:
Post a Comment