Free Summer Crochet Pillows Ozzy, Starla & Bait Pattern©
By Connie Hughes Designs©
And they came from the Sea...that's right!
Here's My Free Summer Pillow Patterns!!
It just isn't summer without pillows!!
They're fun and a little quirky, with their big eyes and
bright colors and best of they're FREE and super easy to make!
I'm Bait
and I'm Starla
These really are easy to make and ultra cute...perfect for the kiddies or to
decorate your patio lawn furniture.
Red Heart Yarns Used in Patterns:
Flame
Glowworm
Turquoise
Grape Fizz
White
Black
Other Materials Used in Patterns:
Poly Fiber-Fill
Stitch Marker
15mm Suncatcher Craft Eyes (starfish)
12mm Black craft Eyes (Octopus)
2 1" Buttons in White
2 Smaller Buttons in Black
Sewing Needle & Thread
Hot Glue & Gun (optional)
Tapestry Needle
Black & Red Felt (for mouth & tongue)
Hooks Used in Patterns:
H 5.0mm, 4.5mm, D
Abbreviations Used in Patterns:
Ch-chain
wk-work
sc-single crochet
hdc-half double crochet
dc-double crochet
trc-triple crochet
rsc-reserve single crochet
dec-decrease
FLO-front loops only
st-stitch
sts-stitches
FO-fasten off
The Fish Pillow Measures:
15 ½
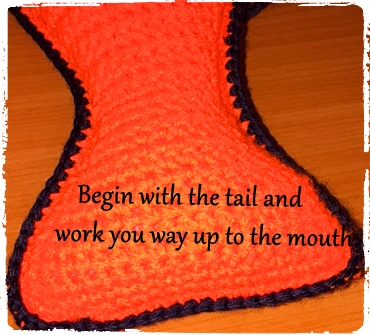
To make the Gold Fish: with Flame & 4.5 Hook (make 2)
Ch21
Row 1. 1sc in 20, ch1 & turn.
Row 2. Dec1sc, 1sc in 16, dec1, ch1 & turn.
Row 3. 1sc in 18, ch1 & turn.
Row 4. Dec1sc, 1sc in 14, ch1 & turn.
Row 5. 1sc in 16, ch1 & turn.
Row 6. Dec1sc, 1sc in 12, dec1sc, ch1 & turn.
Row 7. 1sc in 14, ch1 & turn.
Row 8. Dec1sc, 1sc in 10, dec1sc, ch1 & turn.
Row 9. 1sc in 12, ch1 & turn.
Row 10. Dec1sc, 1sc in 8, dec1sc, ch1 & turn.
Row 11. 1sc in 10, ch1 & turn.
Row 12. Dec1sc, 1sc in 6, dec1sc, ch1 & turn.
Row 13. 1sc in 8, ch1 & turn.
Stuff the Fish as you work
Rows 14-15. 1sc in 8sts, ch1 & turn.
Row 16. 2sc, 1sc in 6, 2sc, ch1 & turn.
Row 17. 1sc in 10, ch1 & turn.
Row 18. 2sc, 1sc in 8, 2sc, ch1 & turn.
Row 19. 1sc in 12, ch1 & turn.
Row 20. 2sc, 1sc in 10, 2sc, ch1 & turn.
Row 21. 1sc in 14, ch1 & turn.
Row 22. 2sc, 1sc in 12, 2sc, ch1 & turn.
Row 23. 1sc in 18, ch1 & turn.
Row 24. 2sc, 1sc in 14, 2sc, ch1 & turn.
Row 25. 1sc in 18, ch1 & turn.
Row 26. 2sc, 1sc in 16, 2sc, ch1 & turn.
Row 27. 1sc in 20, ch1 & turn.
Row 28. 2sc, 1sc in 18, 2sc, ch1 & turn.
Row 29. 1sc in 22, ch1 & turn.
Row 30. 2sc, 1sc in 20, 2sc, ch1 & turn.
Row 31. 1sc in 24, ch1 & turn.
Row 32. 2sc, 1sc in 22, 2sc, ch1 & turn.
Row 33. 1sc in 26, ch1 & turn.
Row 34. 2sc, 1sc in 24, 2sc, ch1 & turn.
Row 35. 1sc in 28, ch1 & turn.
Row 36. 2sc, 1sc in 26, 2sc, ch1 & turn.
Row 37. 1sc in 30, ch1 & turn.
Rows 38-39. Repeat row 37
Row 40. Dec1sc, 1sc in 26, dec1sc, ch1 & turn.
Row 41. 1sc in 28, ch1 & turn.
Row 42. Dec1sc, 1sc in 24, dec1sc, ch1 & turn.
Row 43. 1sc in 26, ch1 & turn.
Row 44. Dec1sc, 1sc in 22, dec1sc, ch1 & turn.
Row 45. 1sc in 24, ch1 & turn.
Row 46. Dec1sc, 1sc in 20, dec1sc, ch1 & turn.
Row 47. 1sc in 22, ch1 & turn.
Row 48. Dec1sc, 1sc in 18, dec1sc, ch1 & turn.
Row 49. 1sc in 20, ch1 & turn.
Row 50. Dec1sc, 1sc in 16, dec1sc, ch1 & turn.
Row 51. 1sc in 18, ch1 & turn.
Row 52. Dec1sc, 1sc in 14, dec1sc, ch1 & turn.
Row 53. 1sc in 16, ch1 & turn.
Row 54. Dec1sc, 1sc in 12, dec1sc, ch1 & turn.
Row 55. 1sc in 14, ch1 & turn.
Row 56. Dec1sc, 1sc in 10, dec1sc, ch1 & turn.
Row 57. 1sc in 12, ch1 & turn.
Row 58. Dec1sc, 1sc in 8, dec1sc, ch1 & turn.
Row 59. 1sc in 10, ch1 & turn.
Row 60. Dec1sc, 1sc in 6, dec1sc, ch1 & turn.
Row 61. Dec1sc, 1sc in 4, dec1sc, ch1 & turn.
Row 62. Dec1sc, 1sc in 2, dec1sc, ch1 & turn.
Row 63. Dec1sc 2x, wk 1sc around entire piece and FO.
With black put the 2 pieces together and wk 1sc around each stand FO.
To make the Fin on each side: with Flame & 4.5 Hook (make 2)
Ch3
Row 1. 1sc in 2, ch1 & turn.
Row 2. 2sc, 2sc, ch1 & turn.
Row 3. 1sc in 4, ch1 & turn.
Row 4. 2sc, 1sc in 2, 2sc, ch1 & turn.
Row 5. 1sc in 6, ch1 & turn.
Row 6. 2sc, 1sc in 4, 2sc, ch1 & turn.
Row 7. 1sc in 8, ch1 & turn.
Row 8. 2sc, 1sc in 6, 2sc, ch1 & turn.
Row 9. 1sc in 10, ch1 & turn.
Row 10. 2sc, 1sc in 8, 2sc, ch1 & turn.
Row 11. 1sc in 12, ch1 & turn.
Rows 12-13. 1sc in 12, ch1 & turn.
Row 14. 2sc, 1sc in 10, 2sc, ch1 & turn.
Row 15. 1sc in 14, ch1 & turn.
Rows 16-17. 1sc in 14, ch1 & turn.
Row 18. 1sc around each side and FO.
Sew one on each side of fish.
To make the Fin on the top: with Flame & 4.5 Hook (make 2)
Ch21
Row 1. 1sc in 5, 1hdc in 5, 1dc in 5, 1trc in 5, ch3 & turn.
Row 2. 1trc in 5, 1dc in 5, 1hdc in 5, 1sc in 4, 1sl stand FO.
Work 1sc around the sides and the top, leaving the bottom open. Place it so there’s one piece on each side and sew in place.
With a tapestry needle make a mouth, sew the white & black buttons on for eyes.
The Starfish Measures: 14 ½
To make the Starfish: with Glowworm & H Hook (make 2)
Ch2
Row 1. Wk 6sc in the second st from the hook.
Row 2. 2sc in each st -12sts.
Row 3. 1sc, 2sc-18sts.
Row 4. 1sc in 2, 2sc -24sts.
Row 5. 1sc in 3, 2sc-30sts.
Row 6. 1sc in 4sts, 2sc-36sts.
Row 7. 1sc in 5sts, 2sc -42sts.
Row 8. 1sc in 6sts, 2sc-48sts.
Row 9. 1sc in 7sts, 2sc-54sts.
Row 10. 1sc in 8, 2sc-60sts.
Row 11. 1sc in 9, 2sc-66sts.
Row 12. 1sc in 10, 2sc-72sts.
Row 13. 1sc in 11, 2sc-78sts.
Row 14. 1sc in 12, 2sc-84sts.
Row 15. 1sc in 13, 2sc-90sts.
Row 16. 1sc in 18, ch1 & turn.
Row 17. Repeat row 16
Row 18. Dec1sc, 1sc in 14, dec1sc, ch1 & turn.
Row 19. 1sc in 16sts, ch1 & turn.
Row 20. Dec1sc, 1sc in 12, dec1sc, ch1 & turn.
Row 21. 1sc in 14sts, ch1 & turn.
Row 22. Dec1sc, 1sc in 10, dec1sc, ch1 & turn.
Row 23. 1sc in 12, ch1 & turn.
Row 24. Dec1sc, 1sc in 8, dec1sc, ch1 & turn.
Row 25. 1sc in 10, ch1 & turn.
Row 26. Dec1sc, 1sc in 6, dec1sc, ch1 & turn.
Row 27. 1sc in 8, ch1 & turn.
Row 28. Dec1sc, 1sc in 4, dec1sc, ch1 & turn.
Row 29. 1sc in 6, ch1 & turn.
Row 30. Dec1sc, 1sc in 2, dec1sc, ch1 & turn.
Row 31. 1sc in 4, ch1 & turn.
Row 32. Dec1sc, dec1sc, ch1 & turn.
Row 33. Dec1sc and FO.
Reattach yarn and repeat rows 16-33 4x, with a 4.5 hook put the 2 together and wk 1sc in each st around. Stuff as you go.
To make the Eyes for the Octopus/Starfish: with White & 4.5 Hook
Ch2
Row 1. Wk 6sc in the second st from the hook.
Row 2. 2sc in each st -12sts.
Row 3. 1sc, 2sc-18sts.
Rows 4-5. 1sc in 18sts.
Put safety eyes on.Row 6. 1sc, dec1sc all the way around, stuff.
Row 7. Dec1sc until closed.
Sew the eyes in place.
To make the Bow: with Grape Fizz & 4.5 Hook
Ch13
Row 1. 1sc in 12sts, ch1 & turn.
Row 2. Dec1sc, 1sc in 8, dec1sc, ch1 & turn.
Row 3. 1sc in 10, ch1 & turn.
Row 4. Dec1sc, 1sc in 6, dec1sc, ch1 & turn.
Row 5. 1sc in 8, ch1 & turn.
Row 6. dec1sc, 1sc in 4, dec1sc ch1 & turn.
Row 7. 1sc in 6, ch1 & turn.
Row 8. dec1, 1sc in 2, dec1sc, ch1 & turn.
Row 9. 2sc, 1sc in 2, 2sc, ch1 & turn.
Row 10. 1sc in 6, ch1 & turn.
Row 11. 2sc, 1sc in 4, 2sc, ch1 & turn.
Row 12. 1sc in 8sts, ch1 & turn.
Row 13. 2sc, 1sc in 6, 2sc, ch1 & turn.
Row 14. 1sc in 10, ch1 & turn.
Row 15. 2sc, 1sc in 8, 2sc, ch1 & turn.
Row 16. 1sc in 12sts and FO.
To make the center of the Bow: with Grape Fizz & 4.5 Hook
Ch7
Row 1. 1sc in 6sts, ch1 & turn.
Row 2. Repeat row 1 and FO.
Sew to the center of the bow.
Cut-out a mouth & tongue for starfish and octopus. Glue or sew in place.
The Octopus measures about: 9 ½ tall
To make the Octopus: with Turquoise & 4.5 Hook
Ch2
Row 1. Wk 6sc in the second st from the hook.
Row 2. 2sc in each st -12sts.
Row 3. 1sc, 2sc-18sts.
Row 4. 1sc in 2, 2sc -24sts.
Row 5. 1sc in 3, 2sc-30sts.
Row 6. 1sc in 4sts, 2sc-36sts.
Row 7. 1sc in 5sts, 2sc -42sts.
Row 8. 1sc in 6sts, 2sc-48sts.
Row 9. 1sc in 7sts, 2sc-54sts.
Row 10. 1sc in 8, 2sc-60sts.
Row 11. 1sc in 9, 2sc-66sts.
Rows 12-28. 1sc in each st around.
Row 29. 1sc in 9, dec1sc-60sts.
Row 30. 1sc in 8, dec1sc-54sts.
Row 31. 1sc in 7, dec1sc-48sts.
Row 32. 1sc in 6, dec1sc-42sts.
Row 33. 1sc in 5, dec1sc-36sts.
Row 34. 1sc in 4, dec1sc-30sts.
Row 35. 1sc in 3, dec1sc-24sts.
Stuff
Row 36. 1sc in 2, dec1sc-18sts.
Row 37. 1sc in 1, dec1sc-12sts.
Row 38. Dec1sc until closed and FO.
To make the Sailor Hat: with White & 4.5 Hook
Ch2
Row 1. Wk 6sc in the second st from the hook.
Row 2. 2sc in each st -12sts.
Row 3. 1sc, 2sc-18sts.
Row 4. 1sc in 2, 2sc -24sts.
Row 5. 1sc in 3, 2sc-30sts.
Row 6. 1sc in 4sts, 2sc-36sts.
Row 7. 1sc in 5sts, 2sc -42sts.
Row 8. 1sc in 6sts, 2sc-48sts.
Row 9. 1sc in 48sts.
Rows 10-18. Repeat row 9
Row 19. 1hdc in the FLO all the way around.
Rows 20-22. 1hdc in each st around.
Attach Grape Fizz
Row 23. Wk 1rsc in each st around and FO.
Stuff hat lightly and sew on to the Octopus.
To make the Octopus Tentacles: with Turquoise/Grape Fizz & 4.5 Hook
Ch47 (make 8 tentacles in Turquoise & 8 tentacles in Grape Fizz.
Row 1. 1sc in 30, 1hdc in 15, 2hdc in the last st, now working on the other side, 1hdc in 15, 1sc in 30.
Row 2. 2sc, 1sc in 29, 1hdc in 16, 2hdc in 3, 1hdc in 15, 1sc in 29, 1sl st and FO.
With Grape Fizz put the 2 pieces together and wk 1sc around both and FO.
To make the small Suction Cups: with Turquoise & D Hook
Make 3 for each Tentacle-ch2, 6sc in the 2nd st from the hook and FO.
Sew in place.
To make the loops: fold the tip of each tentacle over and sew in place with a needle & thread.
Then sew the other end to the bottom of the Octopus.
Sew the 2nd loop
You are now done with your
Free Summer Crochet Pillows Ozzy, Starla & Bait Pattern©.
I hope who ever your making them for loves
them as much as I loved making them!
Happy Crocheting!
Connie
Free Summer Crochet Pillows Ozzy, Starla & Bait Pattern© is for personal use.
Characters, Photos, Patterns & Designs Copyright Protected All Rights Reserved.
Connie's Spot© Connie's Spot Crocheting© Connie Hughes Designs©
Thanks for Supporting Connie's Spot© Sponsors!!