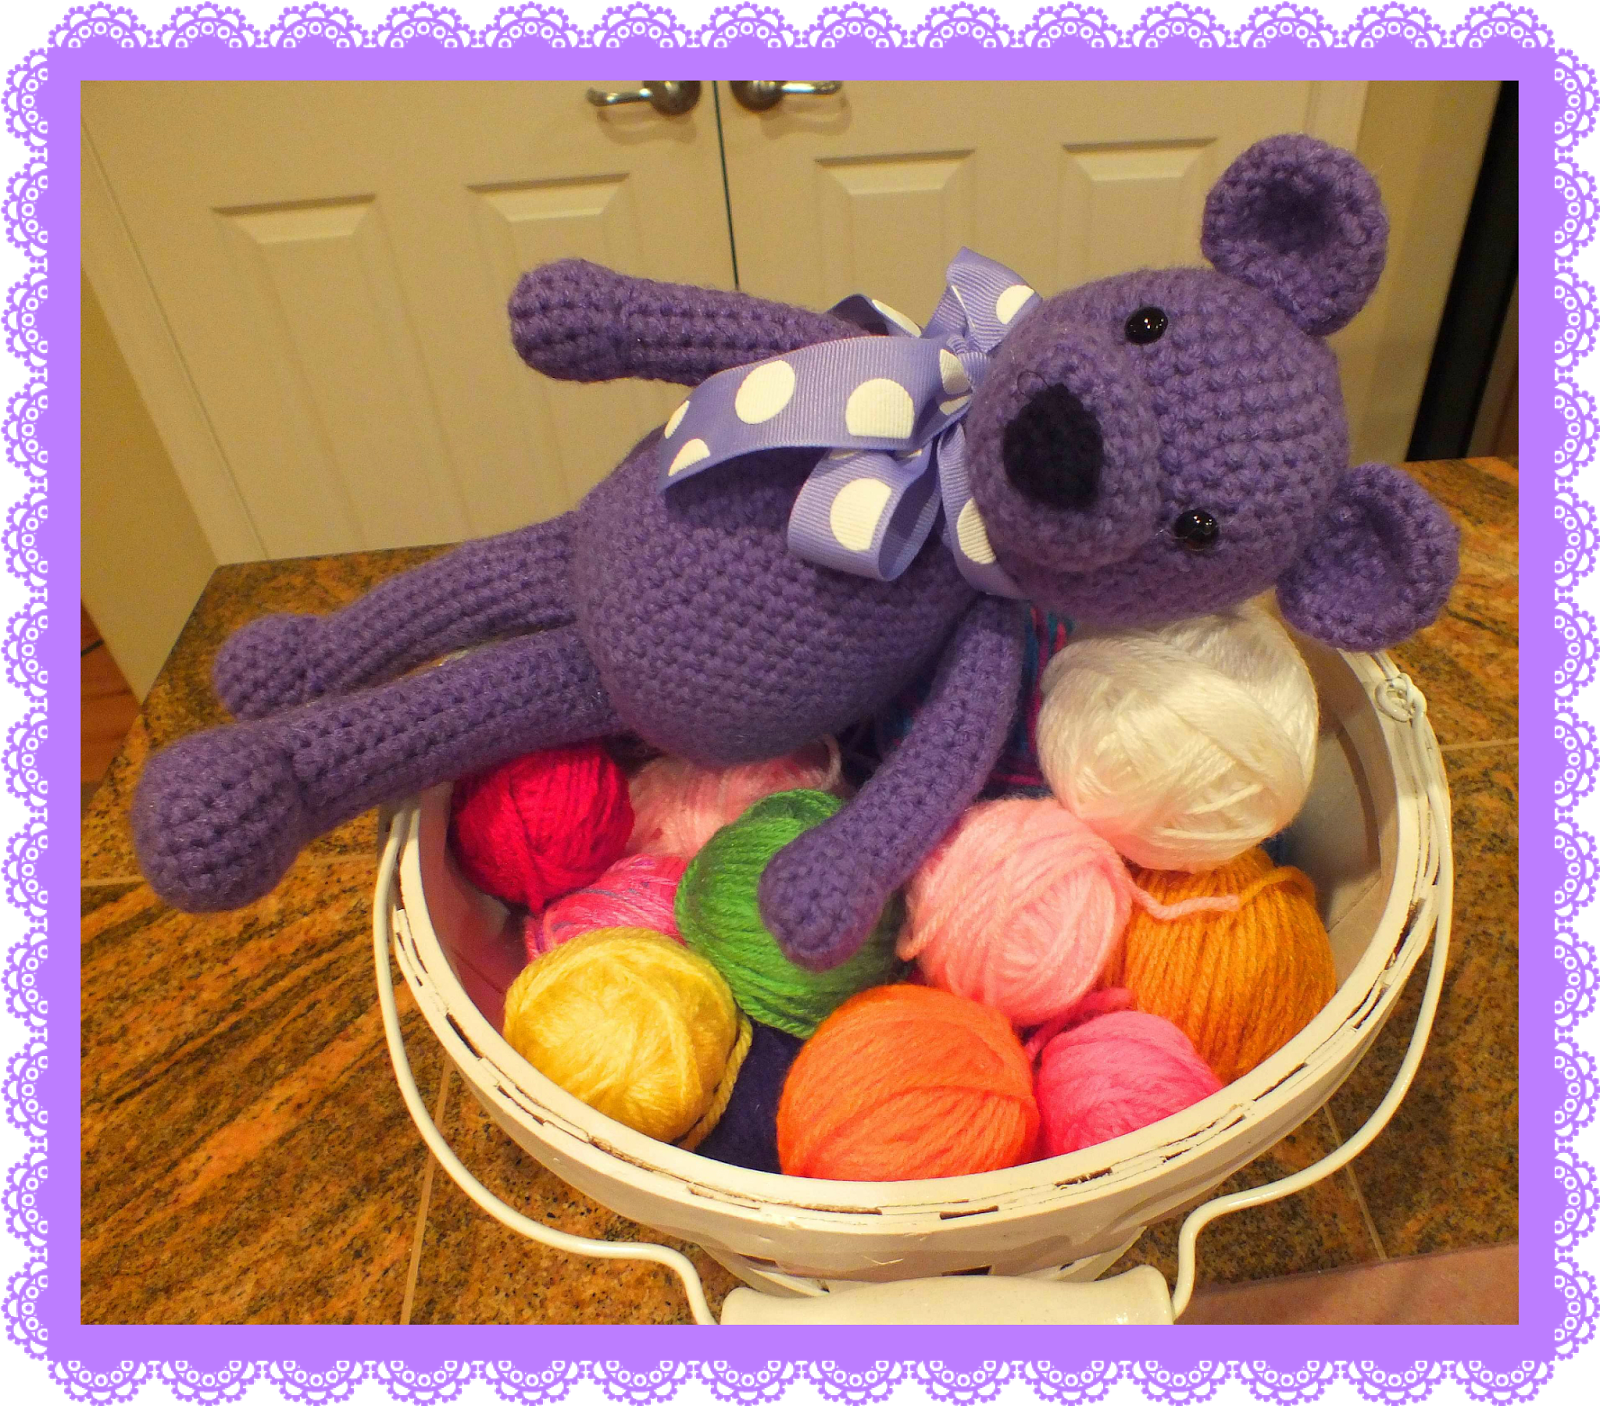
Free Purple Teddy Crochet Pattern©
By Connie Hughes Designs©
Hello everyone...Here's another cute Free Pattern.
Make this cute Little Bear out of your scraps...its quick & super easy!
(To make the Teddy Bear I used Red Heart Yarn in Lavender, not Purple).
To make Teddy Bear: with Purple & F Hook
The head & body are all one piece
Ch2
Row 1. 6sc in the 2nd st from the hook.
Row 2. 2sc in each st around-12sts.
Row 3. 1sc, 2sc in the next st-18sts.
Row 4. 1sc in 2, 2sc in the next st-24sts.
Row 5. 1sc in 3, 2sc in the next st-30sts.
Row 6. 1sc in 4, 2sc in the next st-36sts.
Row 7. 1sc in each st around -36sts.
Rows 8-15. Repeat row 7
Place eyes in row 10 about 6sts apart
Row 16. 1sc in 4, dec1sc-30sts.
Row 17. 1sc in 3, dec1sc-24sts.
Row 18. 1sc in 2, dec1sc-18sts.
Stuff
Row 19. 1sc, dec1sc-12sts.
To make the Teddy Bears Body:
Row 20. 1sc, 2sc in the next st-18sts.
Row 21. 1sc in 2sts, 2sc in the next st-24sts.
Row 22. 1sc in 3, 2sc in the next st-30sts.
Row 23. 1sc in 4, 2sc in the next st-36sts.
Row 24. 1sc in each st around-36sts.
Rows 25-27. Repeat row 24
Row 28. 1sc in 5, 2sc in the next st-42sts.
Row 29. 1sc in each st-42sts.
Rows 30-32. Repeat row 29
Row 33. 1sc in 6, 2sc in the next st-48sts.
Row 34. 1sc in 48sts.
Rows 35-36. Repeat row 34
Row 37. 1sc in 6, dec1sc-42sts.
Row 38. 1sc in 5, dec1sc-36sts.
Stuff Body as you go
Row 39. 1sc in 4, dec1sc-30sts.
Row 40. 1sc in 3, dec1sc-24sts.
Row 41. 1sc in 2, dec1sc-18sts.
Row 42. 1sc in 1, dec1sc-12sts.
Decrease stitches until closed and FO.
To make the Ears: with Purple & F Hook (make 2)
Ch2
Row 1. 6sc in the 2nd st from the hook.
Row 2. 2sc in each st around-12sts.
Row 3. 1sc, 2sc in the next st-18sts.
Rows 4-6. Repeat row 3
Dec sts until closed and FO.
Sew ears in top of head.
To make the Purple Muzzle: with Purple & F Hook
Ch2
Row 1. 6sc in the 2nd st from the hook.
Row 2. 2sc in each st around-12sts.
Row 3. 1sc, 2sc in the next st-18sts.
Row 4. 1sc in 2, 2sc, 1sc in 4, 2sc, 1sc in 4, 2sc in 2sts, 1sc in 4sts-22sts.
Rows 5-8. 1sc in each st around, FO at the end of row 8.
Stuff muzzle lightly and sew on to the face just under the eyes.
To make the Black Nose: with Black Yarn & D Hook
Ch5
Row 1. 1sc in 4sts, ch1 & turn.
Row 2. Dec1sc, dec1sc, ch1 & turn.
Row 3. Dec1sc and FO.
Sew nose on the muzzle.
To make the Arms: with Purple & F Hook (make 2)
Ch2
Row 1. 6sc in the 2nd st from the hook.
Row 2. 2sc in each st around-12sts.
Rows 3-5. Repeat row 2
Stuff as you go
Row 6. Dec 1sc 3x, 1sc in 8sts.
Rows 7-21. 1sc in 9sts
Row 22. Dec sts until closed and FO.
Sew each are into place.
To make the Legs: with Purple & F Hook (make 2)
Ch2
Row 1. 6sc in the 2nd st from the hook.
Row 2. 2sc in each st around-12sts.
Row 3. 1sc, 2sc in the next st-18sts.
Rows 4-7. 1sc in each st around-18sts.
Row 8. Dec1sc 6x, 1sc in 6sts.
Row 9. 1sc in the FLO in 6sts, 1sc in 6sts.
Stuff as you go, when you get to top part of leg stuff it lightly so the legs bend easily.
Row 10. 1sc in each st-12sts
Rows 11-28. Repeat row 10, ch1.
Row 29. Seal up leg by working 1sc through both sides you should have 6sts, ch1 & turn.
Rows 30-33. 1sc in each st FO at the end of row 33.
Sew legs onto the body, tie a cute ribbon around the neck and you are done!
Free Purple Teddy Crochet Pattern©
By Connie Hughes Designs©
This pattern is for personal use.
Do no sell this pattern it is Copyright Protected.
All Rights Reserved.
Connie’s Spot© & Connie Hughes Designs©
I hope you enjoy making this Pattern & who you’re
making it for enjoys it even more!
Happy Crocheting!
Connie
Thanks for Supporting Connie's Spot©!!
Here's Some Of Our Most Popular Easter Patterns !!
The Hopper Bunny Doll Family Crochet Pattern©

The Crochet Pattern Includes The Hopper Bunny Family All 5 Dolls,
Instant Digital Download: 1 PDF included
All for Only $3.99
To Purchase this pattern just click on the link below:
Pippa the Purple Bunny Doll Pattern©
The pattern includes the doll and all the crocheted accessories pictured.
Plus lots of how to pictures!!
The Pattern is available for only $2.99
Instant Digital Download: 1 PDF included
To Purchase this pattern just click on the link below:
Connie's Portable Purple Doll House©
Christmas Gingerbread House©
Halloween Haunted House Patterns©

Pattern includes All Three Houses Plus All Crochet Accessories & The Doll House Opens Up! All for Only $5.00 Instant Digital Download: 1 PDF included
To Purchase this pattern just click on the link below:
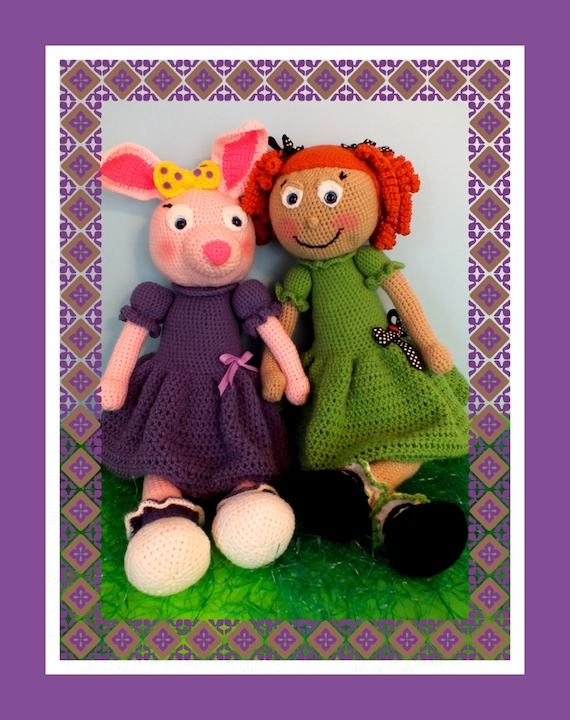
Meet Zoe Girl© & Her Bunny Buddy Jelly Bean©
Pattern makes both of these cute dolls and has step by step instructions with lots of pictures! They are both 27" tall...and Jelly Bean© is 30" tall with her ears
All for Only $2.99
Instant Digital Download: 1 PDF included
To Purchase this pattern just click on the link below:
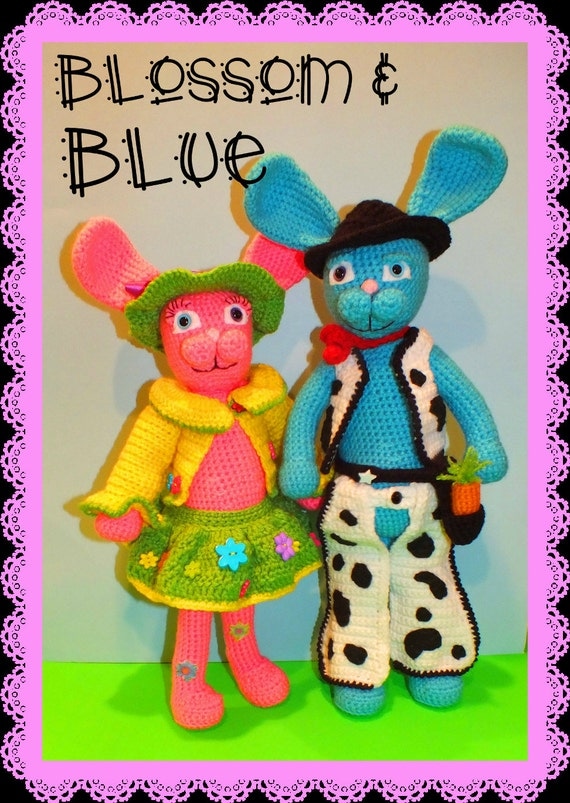
Blossom & Blue Bunny Pattern©