Welcome to Connie's Spot

The Above Picture is some of Connie's Spot© Crochet Patterns© All Patterns are Available at my Shop on ETSY Welcome to the Multiple Award-Winning Connie's Spot© & Connie Hughes Designs© Crocheting Blog! Check out Connie's New Endeavor Paper Crafting-Journals!! Now in our 12th Year We Want to Thank All Our Customers/Friends Who Have Helped Us Grow with Thousands of Pattern Sales/Downloads, and Over "ONE MILLION PAGE VIEWS" from All Over the World!!!

If you are new to Connie's Spot© make sure to take the time to follow Connie's Spot© Her Patterns are available at her shop on Etsy. Check out Connie's Spot© Blog Archive of 300+Posts!! That includes Free Crochet Patterns from Connie Hughes Designs© Free Recipes, New Paper Crafting-Journals, Decorating Tips, & Poetry!

As always Connie's Spot© is free of Pop-Ups and Invasive Ads...so take your time and explore her blog post archives its loaded with gems...most of all enjoy! Connie's Spot© will receive a small commission if you make a purchase after clicking on the Advertiser/Sponsor Links. This helps cover the cost for providing free patterns! Thanks for Visiting Connie's Spot© Blog!!

Connie's Spot© Crocheting & Connie Hughes Designs© Characters, Photo's, Designs & Patterns are All Copyright© Protected All Rights Reserved.

Shop Connies Spot© and Connie Hughes Designs© Crochet Patterns & Handmade Journals on Etsy!!

Shop Connies Spot© and Connie Hughes Designs© Crochet Patterns & Handmade Journals on Etsy!!
Shop Connies Spot© and Connie Hughes Designs© Crochet Patterns & Handmade Journals on Etsy!! https://conniesspot.etsy.comShop Connie's Spot© and Connie Hughes Designs© Crochet Patterns & Handcrafted Journals on Etsy!! Now Over 1000 Sales of Finished Products & Patterns, Plus Over 100 5-Star Reviews!! To All Our Customers Thank You!!! Just Click on the Picture above to take you to my shop on Etsy!

Over ONE MILLION PAGE VIEWS!! To All Our Friends, Followers Customers & Visitors Welcome!!

Connie's Spot© Language Translator

Saturday, April 26, 2014

Free Teddy Bear Granny Circle Security Blanket Pattern©

"Free Teddy Bear Granny Circle Security Blanket Pattern©"
Another Free Pattern by Connie Hughes Designs©
Super easy and a quick project to make...Plus you
could make place mats, doilies, a table runner or a center piece.
Perfect for toddlers!


I really love to crochet the granny circle…it’s very easy once you get the hang of it…I’ve written out for the Teddy Bear Security Blanket pattern to share with you for free…it includes how to make the bear and of course the circle.

I hope you like it and please feel free to sell your made products from this pattern…just please don’t sell the pattern.

Materials used:
Red Heart Yarn in
1 Roll of Light Blue
Suncatcher Craft Eyes 12mm
1 Roll of White
Needle & Matching Thread
Poly-Fill

Hook Sizes:
I, F, C or D

To make the Teddy Bear head with an F hook and Light Blue yarn
Ch2
Row 1. Wk 6sc in the second st from the hook.
Row 2. 2sc in each st, around-12sts.
Row 3. 1sc in the next, 2sc in the next st around-18sts.
Row 4. 1sc in 2, 2sc in the next st, around-24sts.
Row 5. 1sc in 3 sts, 2sc in the next, around-30sts.
Row 6. 1sc in 4, 2sc in the next st, around-36sts.
Row 7. 1sc in 5, 2sc in the next, around-42sts.
Rows 8-19. 1sc in each st, around-42sts,
Row 20. 1sc in 2 sts, dec1, around-28sts.
Row 21. 1sc, dec1 all the way around.
If using safety eyes stuff and put them in and position them around row 10 from the top. Take out the stuffing and put the washer in to secure the eyes.
Continue to row 22.
Row 22. Continue to dec your sts, until closed and FO.


For the body with an F hook
Repeat rows 1 through 6 of the head
Row 7. 1sc in each st around-36sts.
Rows 8-15. Repeat row 7
Row 16. 1sc in the next 2 sts, dec1-around, stuff and continue decreasing until closed.

To make the ears (make 2) with an F hook
Ch2
Row 1. 6sc in the second st from the hook.
Row 2. 2sc in each st-12sts.
Rows 3-4. 1sc in 12sts.
Row 5. 1sc in 5, 2sc in the next, 1sc in 5, 2sc-14sts.
Row 6. 1sc in 14 sts and FO.
Sew to the top of head.

To make the White collar with an F hook
Make a ch long enough to go around the neck area.
Wk 3dc into each ch space, all the way down ch1 & turn.
Wk 1dc in each st across and FO.
Sew it around neck.
 
To make the muzzle with an F hook
Ch2
Row 1. Wk 6sc in the second st from the hook.
Row 2. 2sc in each st around-12sts.
Row 3. 2sc in the next 2 sts, 1scin the next, 2sc,1sc in next 2sts, 2sc in 2, 1sc in the next 4sts.
Row 4. 1sc in 2, 2sc in the next 2, 1sc in the next 2 sts, 2sc in 2, 1sc in 3, 2sc in the next 2 sts, 1sc in 4 sts.
Row 5. 1sc in each st, around.
Row 6. Wk 1sc in each st, 1sl st and FO.
Sew part to the face area, stuff very lightly sew the rest of the way.

To make the little black nose with a C or D hook
Ch6
Row1. 1sc in 5 sts, ch1 & turn.
Row 2. Repeat row 5, ch1 & turn.
Row 3. dec1, 1sc, dec1, ch1 & turn.
Row 4. dec1, 1sc, ch1 & turn.
Row 5. Dec1 and FO.
Sew onto the muzzle.
To make the arms with F hook (make 2)


Ch2
Row 1. 6sc in the second st from the hook.
Row 2. 2sc in each st around-12sts.
Row 3. 1sc, 2sc in the next st, around-18sts.
Rows 4-8. 1sc in 18sts.
Row 9. 1sc, dec1, around-12sts.
Row 10. 1sc in each st, around.
Row 11. Wk 1sc in FlO all the way around.
Rows 12-23. 1sc in each st and FO.

To make the Blanket part with an I hook
Ch3
(in this pattern ch3 counts for the first st)
Row 1. Wk 11dc in the second ch st from the hook, (you will have 12sts) join & ch3.
Row 2. Wk 2dc in each st, ch1, repeat all the way around join with a sl st, sl st to the next ch1 space and ch3.
Row 3. 2dc in each ch space, ch1 repeat all the way around, join with a sl st and sl st to the next ch1 space and ch3.
Row 4. 3dc in each ch space, ch1, repeat all the way around (you will always join with a sl st and then sl st your way to the next ch1 space unless instructed).
Row 5. Wk 2dc in the next space, ch1 and wk 2 more dc in the same space, ch1, and repeat all the way around, ch3.
Row 6. Wk 2dc in the next space, ch1, wk 3dc, ch1, repeat and ch3.
Row 7. Wk 3dc, ch1, 3dc, repeat, (remembering to st st to next ch1 space) ch3.
Row 8. Wk 4dc in the next space, ch1, repeat all the way around, ch3.
Row 9. Wk 2dc, ch1, wk 2dc in the same space, repeat and ch3.
Row 10. Wk 3dc in the next ch1 space, ch1, wk 2dc in the next space, repeat and ch3.
Row 11. Wk 2dc in the next ch space, ch1, repeat all the way around and ch3.
Rows 12-15. Wk 3dc in each space, ch1, repeat and ch3.
Row 16. Wk 2dc in the next space, ch1, wk 2dc, ch1, wk 2dc in the same space all the way around and FO.

To make the ruffle change to White
Row 1. wk 1sc in each st and even the ch1 space, around, join and ch3.
Row 2. Wk 3dc in each st around, ch3 & turn..
Row 3. Wk 1dc in each st around and FO.
Now sew teddy to the center of the blanket.


Free Pattern by Connie Hughes Designs©
This pattern is for personal use.

Teddy Bear Granny Circle Security Blanket Pattern©
it is Copyright Protected.
All Rights Reserved.
Connie Hughes Designs© & Connie’s Spot©
  I hope you enjoy making this Pattern & who you’re
making it for enjoys it even more!

Happy Crocheting!!
Connie


Thanks For Supporting Connie's Spot© Sponsors!


Thursday, April 24, 2014

The Twinkle Toe Trio Crochet Doll Pattern©

Meet The Twinkle Toe Trio©
By Connie Hughes Designs©
Here's the trio of ballerina friends...
Lily Ballerina© Candy Ballerina© Lucy Ballerina©
All 3 Completed Dolls where made with Suncatcher Craft Eyes!
As always I try hard to make my patterns very affordable...
Plus this 1 Pattern Makes All 3 Ballerina's for only $2.49!!
Meet Lily Ballerina©
She loves to sit on her Lily Pad
and dance Ballet!
 She has the biggest smile of all...
Here's prim & proper Candy Ballerina©
 she's a little reserved.
She loves to twirl
 There's only one thing she loves more than
the dance...
Her very best friends
Here's Lucy Ballerina© she is very shy
Everyone loves her big blue eyes
She loves to dance and hang out with friends!
Especially her best friends!
The Pattern for All Three Dolls is at Connie's Spot© Shop here's the link:
 

Friday, April 4, 2014

Zoe Girl© and Jelly Bean Bunny© Crochet Doll Pattern©


Meet Zoe Girl© & Her Bunny Buddy Jelly Bean©
by Connie Hughes Designs©
My Pattern will make both of these cute dolls!!
The completed Dolls are available at Connie's Spot© Shop here's the link:
https://www.etsy.com/listing/187501181/crochet-doll-zoe-girl?ref=shop_home_active_2
They're already for Anytime...in their cute little dresses!
The pattern is available at Connie's Spot© Shop here's the link:


Here's Zoe and her red locks all tied up with little bows!
Her little bloomers even have ruffles!
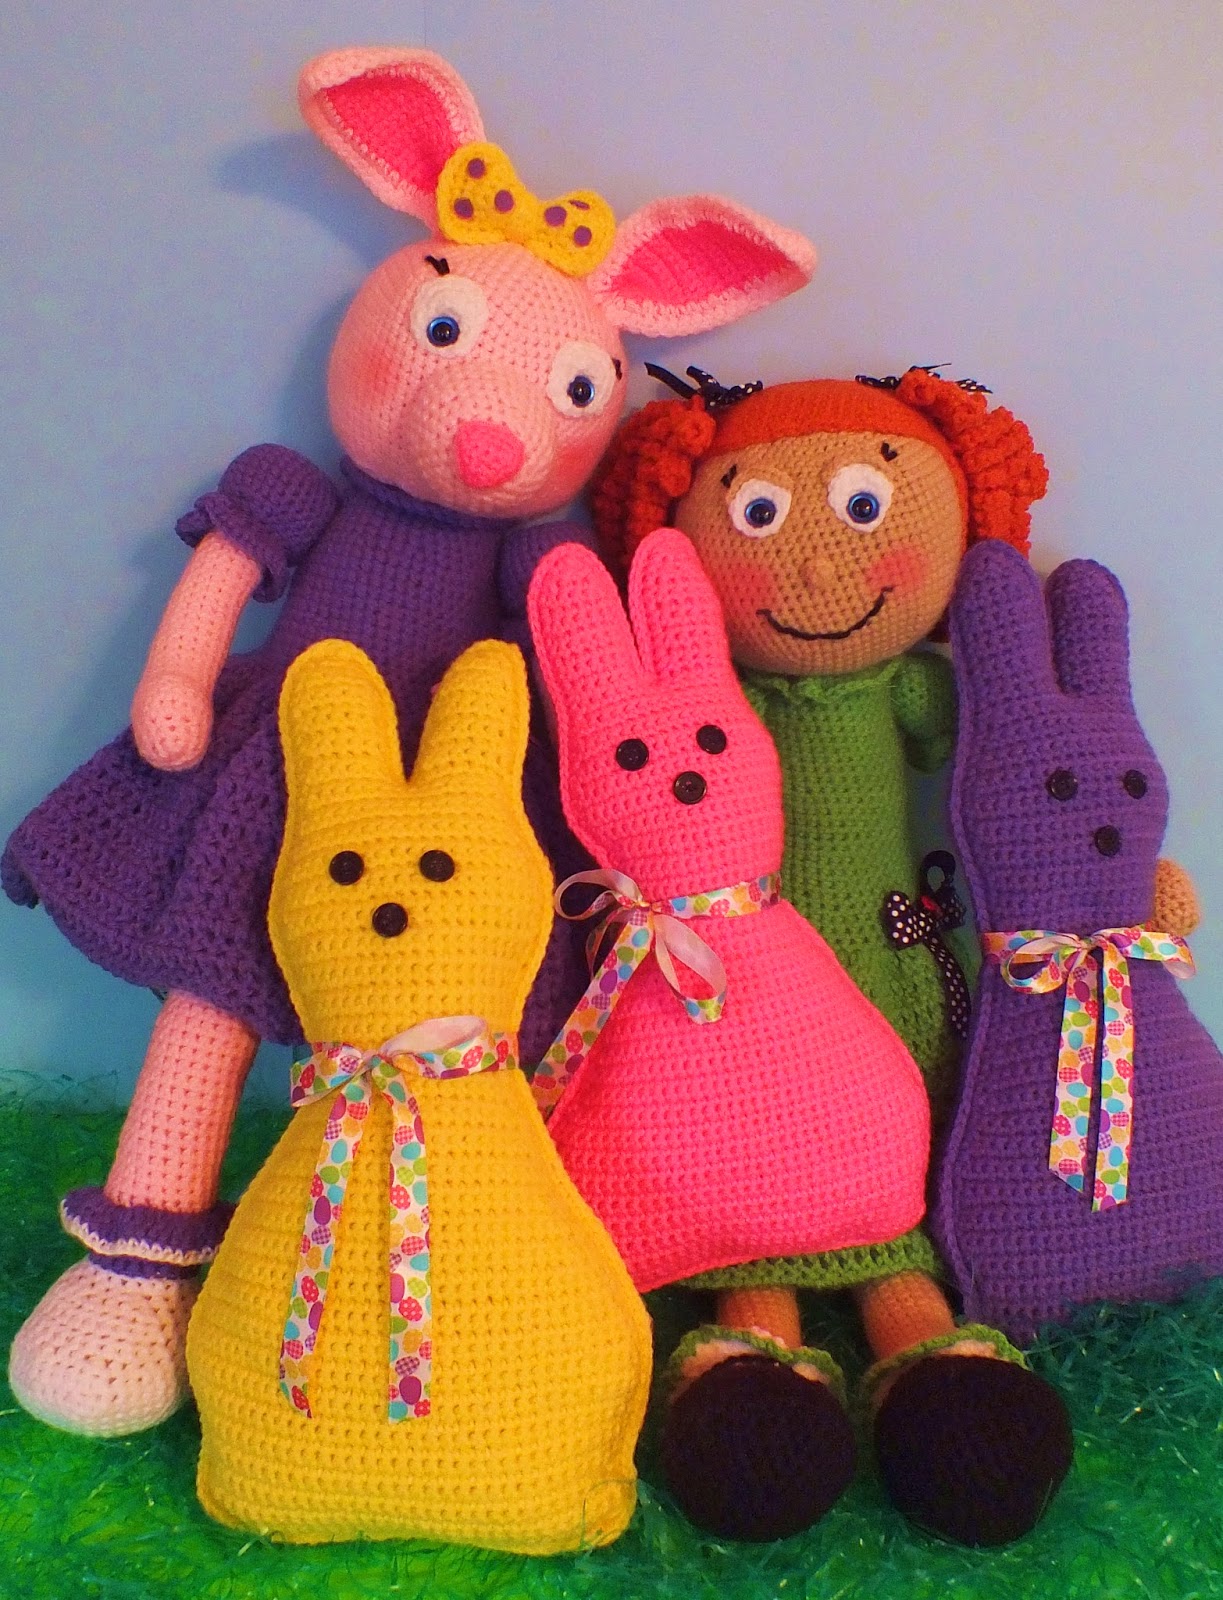
Jelly Bean© loves her Peeps!
 This pattern has step by step instructions with lots of pictures!
 Ruffles on her bloomers!
 Here's the whole gang...the colorful Peeps are a current
Free Pattern on my blog!
 These little Mary Jane's are so cute and easy to make!
 
 "It's Spring...April showers brings May flowers"
 
Pattern is now available!!
The beautiful eyes for both dolls are from Suncatcher Craft Eyes!
Here's her link:
http://www.suncatchereyes.com/


They are both 27" tall...and Jelly Bean© is 30" tall with her ears!
 "Happy Crocheting Everyone"


Thursday, March 27, 2014

Easter Pillow Doll Free Pattern©

"Free Easter Pillow Peep Inspired Doll Pattern©"
By Connie Hughes Designs©
I love this simple pattern...you can do so much with it...
You can make them for each child in any color...
They would be cute on a chair or sofa...
But if your hosting the big Easter Brunch it would be really cute
to sit one of these in each child's chair...or inside an Easter Basket!
Very easy and quick to make...just yarn of any color, buttons for eyes,
poly-fill and some cute ribbon!


Happy Easter Everyone!


Easter Pillow/Doll Free Pattern©
By Connie Hughes Designs©

This is a super easy and quick project to make…this could be used as a pillow or put inside an Easter basket.
I used Red Heart yarns in Pretty in Pink and Bright Yellow and Purple. With a G hook:
Ch 31
Row 1. 1sc in each st, ch1 & turn-30sts.
Rows 2-5. Repeat row 1
Row 6. 2sc, 1sc in 28sts, 2sc, ch1 & turn-32sts.
Rows 7-8. 1sc in 32sts, ch1 & turn.
Row 9. 2sc, 1sc in 30sts, 2sc, ch1 & turn-34sts.
Row 10. 1sc in each st, ch1 & turn.
Row 11. 2sc, 1sc in 32, 2sc, ch1 & turn-36sts.

Rows 12-13. 1sc in 36sts, ch1 & turn.
Row 14. Dec1, 1sc in 32sts, dec1, ch1 & turn-34sts.
Rows 15-16. 1sc in each st, ch1 & turn-34sts.
Row 17. Dec1, 1sc in 30sts, dec1, ch1 & turn-32sts.
Rows18-19. 1sc in each st, ch1 & turn.
Row 20. Dec1, 1sc in 28, dec1, ch1 & turn-30sts.
Rows 21-22. 1sc in each st, ch1 & turn.
Row 23. Dec1, 1sc in 26sts, dec1, ch1 & turn-28sts.
Row 24. 1sc in 28sts, ch1 & turn.

Row 25. Dec1, 1sc in 24sts, dec1, ch1 & turn-26sts.
Row 26. 1sc in 26sts, ch1 & turn.
Row 27. Dec1, 1sc in next 22sts, dec1, ch1 & turn-24sts.
Row 28. 1sc in 24sts, ch1 & turn.
Row 29. Dec1, 1sc in 20, dec1, ch1 & turn-22sts.
Row 30. 1sc in 22sts, ch1 & turn.
Row 31. Dec1, 1sc in 18sts, dec1, ch1& turn-20sts.
Row 32,. 1sc in 20, ch1 & turn.
Row 33. Dec1, 1sc in 16sts, dec1, ch1 & turn-18sts.
Row 34. 1sc in 18sts, ch1 & turn.
Row 35. Dec1, 1sc in 14sts, dec1, ch1 & turn16sts.
Rows 36-37. 1sc in each st, ch1 & turn-16sts.
Row 38. 2sc, 1sc in 14, 2sc, ch1 & turn-18sts.
Rows 39-41. 1sc in each st, ch1 & turn.
Row 42. 2sc, 1sc in 16sts, 2sc, ch1 & turn-20sts.

Rows 43-44. 1sc in 20sts, ch1& turn.
Row 45. 2sc, 1sc in 18, 2sc, ch1 & turn-22sts.
Rows 46-48. 1sc in each st, ch1 & turn-22sts.
Row 49. Dec1, 1sc in 18sts, dec1, ch1 & turn-20sts.
Row 50. 1sc in 20sts, ch1 & turn.
Row 51. Dec1, 1sc 16sts, dec1, ch1 & turn-18sts.
Row 52. 1sc in 18sts, ch1 & turn.
Row 53. Dec1, 1sc in 14, dec1, ch1 & turn-16sts.
Row 54. 1sc in 16sts, ch1 & turn.
Row 55. Dec1, 1sc in 12, dec1, ch1 & turn-14sts.
Row 56. 1sc in 14sts, ch1 & turn.

To make ear:
Row 57. 1sc in 6sts, ch1 & turn-6sts
Rows 58-65. 1sc in 6sts, ch1 & turn.
Row 66. Dec1, 1sc in 2, dec1, ch1 & turn.
Row 67. 1sc in 4sts, ch1 & turn.
Row 68. Dec1, dec1, ch1 & turn.
Row 69. Dec1 and FO.
Make the other ear:

Attach yarn with a sl st, onto the other side and wk 1sc in the same st as the sl st, repeat rows 57-69 and FO. Attach yarn with a sl st, wk 1sc around both pieces and FO. To join the 2 pieces together attach yarn near the bottom, holding both pieces together wk 1sc around. Stuff the ears as you go around. Continue stuffing as you go and FO. Sew buttons on or make French knots for the eyes and nose. Tie a cute little ribbon around it’s neck and you are done.

 Free Pattern by Connie Hughes Designs©
This pattern is for personal use.
Do no sell this pattern it is Copyright Protected.
All Rights Reserved.
Connie Hughes Designs© & Connie’s Spot©
 I hope you enjoy making this Pattern & who you’re
making it for enjoys it even more!
Connie

Thanks for Supporting Connie's Spot© Sponsors!!


Free Easter Pattern Applique's

Well I promised to have some Free Bunny Patterns...and here they are!
 I've made a couple cute and easy to make Easter Applique's.

Pink Bunny Applique's On The Pillow
 
I just love making applique's, you can sew them onto so many things. Blankets, pillows, wall art, place mats…quick somebody stop me. I guess the true art is knowing when to stop.

Make Bunny with a G or F Hook
Ch 11
Row . 1sc in 10sts, ch1 & turn-10sts.
Row 2. 1sc in 10sts, ch1 & turn-10sts.
Row 3. 2sc, 1sc in the next 8, 2sc in the last st, ch1 & turn-12sts.
Row 4. 1sc in 12sts, ch1 & turn-12sts.
Row 5. 2sc, 1sc in the next 10, 2sc in the last, ch1& turn-14sts.
Row 6. 1sc in the next 14sts, ch1 & turn-14sts.
Row 7. 2sc, 1sc in 12 sts, 2sc, ch1 & turn-16sts.
Row 8. 1sc in 16sts, ch1 & turn-16sts.
Row 9. Dec1, 1sc in the next 12sts, dec1,ch1 & turn-14sts.
Row 10. 1sc in the next 14sts, ch1 & turn-14sts.
Row 11. Dec1, 1sc in 10sts, dec1, ch1 & turn-12sts.
Row 12. 1sc in 12, ch1 & turn-12sts.
Row 13. Dec1, 1sc in 8, dec1, ch1 & turn-10sts.
Row 14. 1sc in 10sts, ch1 & turn-10sts.
Row 15. Dec1, 1sc in 6sts, dec1,ch1 & turn-8sts.
Row 16. 1sc in 8sts, ch1 & turn-8sts.
Row 17. Dec1, 1sc in 4, dec1, ch1 & turn-6sts.
Row 18. 1sc in 6sts, ch1 & turn-6sts.
Row 19. 2sc, 1sc in 4, 2sc, ch1 & turn-8sts.
Row 20. 1sc in 8sts, ch1 & turn-8sts.
Row 21. 2sc, 1sc in 6, 2sc, ch1 & turn-10sts.
Rows 22-24. 1sc in each st, ch1 & turn-10sts.
Row 25. Dec1, 1sc in 6, dec1, ch1 & turn-8sts.
Row 26. 1sc in 8sts, ch1 & turn-8sts.
Row 27. Dec1, 1sc in 4, dec1, ch1 & turn-6sts.
Row 28. 1sc in 6, ch1 & turn-6sts.
Row 29. 1sc in 2, ch1 & turn-2sts.
Row 30. 2sc in each st, ch1 & turn-4sts.
Row 31. 1sc in 4, ch1 & turn-4sts.
Row 32. 2sc, 1sc in 2, 2sc, ch1 & turn-6sts.
Rows 33-34. 1sc in 6sts, ch1 & turn-6sts.
Row 35. Dec1, 1sc in 2, dec1, ch1 & turn-4sts.
Row 36. 1sc in 4 sts, ch1 & turn-4sts.
Row 37. Dec1, dec1, ch1 & turn-2sts.
Row 38. Dec1 and FO.
Row 39. To make the other ear, with a sl st attach yarn to other side repeat rows 29-38, wk 1sc around entire bunny and FO.
I like to use a smaller hook for this, I just like how it looks. The pillow is very simple I just did sc and then did a granny square trim.


These little bunny’s on a stick are super easy to make
With an F hook

Ch2
Row 1. Wk 11hdc in the second st from the hook, join and ch1.
Row 2. Wk 2hdc in each st around, join and ch1.
Row 3. Wk 1hdc in the first st, 2hdc in the next st around, join and ch 1.
Row 4. Wk 1sc in the next 3sts, ch1 & turn.
Rows 5-8. Repeat row 4.
Row 10. Dec1, 1sc, ch1 & turn.
Row 11. Dec1 and FO.
Join yarn to make the other ear and FO.
To make the stick part:
With a C hook make a ch as long as you would like and wk 1sl st in each ch st and FO.
Use brown yarn and make French knots for the eyes and nose.
Tie a little bow and sew or glue in place.
This Bunny is just a smaller version of the one
on the pillow!
The small white bunny Applique's on the granny square  G of F hook
(Photo is below)
To make the head
Ch 2
Row 1. Wk 6sc in second ch st from hook-6sts.
Row 2. Wk 2sc in each st around-12sts.
Row 3. Wk 1sc, 2sc in the next st around-18sts.
Row 4. 1sc in next 2sts, 2sc in next st-24sts.
Row 5. Ch9 wk 1sc in 8sts, 1sl st in the next st on the head part, 1sc in the next 2 sts, ch9 and wk 1sc in 8sts, 1sl st, 1sc in 3 sts, sl st and FO.
 

To make the body G & F hook
Ch 11
Row 1. Wk 1sc in 10sts, ch1 & turn.
Rows 2-5. Repeat row 1.
Row 6. Dec1, 1sc in 6sts, dec1, ch1 & turn-8sts.


Rows 7-9. 1sc in 8sts, ch1& turn

Row 10. Dec1, 1sc in 4sts, dec1, ch1 & turn-6sts.
Row 11. 1sc in 6sts, ch1 & turn.
Row 12. Dec1, 1sc in 2,dec1, ch1 & turn-4sts.
Row 13. 1sc in 4sts and FO.
 
To make the legs G or F hook
Ch13
Row 1. Wk 2 bobble sts into the second ch st from hook and 1sl st, 1sc in the next 10sts, 2 bobble sts in the last st and FO.
Sew the head and legs on and whip st some eyes and nose. Don’t forget the bow…everything looks better with a bow on.
I just sewed the little bunny onto a granny square.
 Please feel free to contact me about these patterns or
anything else...and thank you for stopping by!
Happy Crocheting
Connie


Make Sure You Check This Out!! Connie's Spot© Blog Post Archive 300+ Posts Loaded With Gems!!!