Welcome to Connie's Spot

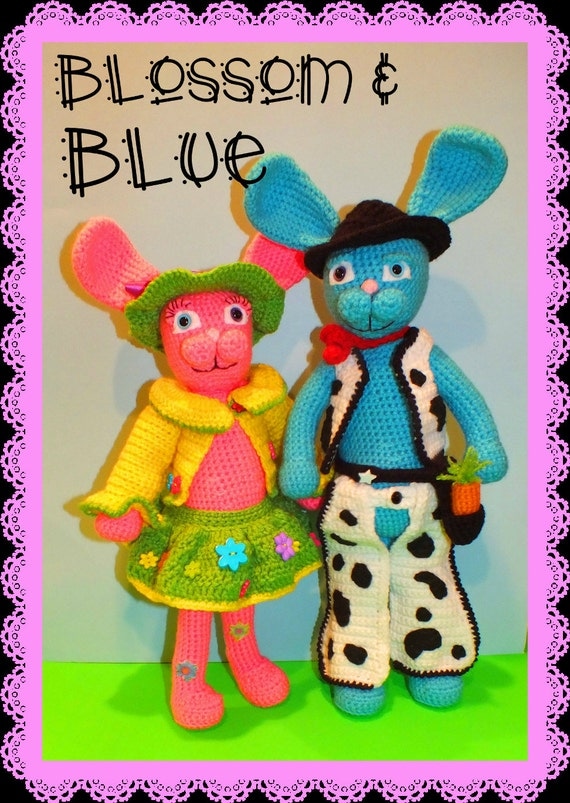
The Above Picture is some of Connie's Spot© Crochet Patterns© All Patterns are Available at my Shop on ETSY Welcome to the Multiple Award-Winning Connie's Spot© & Connie Hughes Designs© Crocheting Blog! Check out Connie's New Endeavor Paper Crafting-Journals!! Now in our 12th Year We Want to Thank All Our Customers/Friends Who Have Helped Us Grow with Thousands of Pattern Sales/Downloads, and Over "ONE MILLION PAGE VIEWS" from All Over the World!!!

If you are new to Connie's Spot© make sure to take the time to follow Connie's Spot© Her Patterns are available at her shop on Etsy. Check out Connie's Spot© Blog Archive of 300+Posts!! That includes Free Crochet Patterns from Connie Hughes Designs© Free Recipes, New Paper Crafting-Journals, Decorating Tips, & Poetry!

As always Connie's Spot© is free of Pop-Ups and Invasive Ads...so take your time and explore her blog post archives its loaded with gems...most of all enjoy! Connie's Spot© will receive a small commission if you make a purchase after clicking on the Advertiser/Sponsor Links. This helps cover the cost for providing free patterns! Thanks for Visiting Connie's Spot© Blog!!

Connie's Spot© Crocheting & Connie Hughes Designs© Characters, Photo's, Designs & Patterns are All Copyright© Protected All Rights Reserved.

Shop Connies Spot© and Connie Hughes Designs© Crochet Patterns & Handmade Journals on Etsy!!

Shop Connies Spot© and Connie Hughes Designs© Crochet Patterns & Handmade Journals on Etsy!!
Shop Connie's Spot© and Connie Hughes Designs© Crochet Patterns & Handcrafted Journals on Etsy!! Now Over 1000 Sales of Finished Products & Patterns, Plus Over 100 5-Star Reviews!! To All Our Customers Thank You!!! Just Click on the Picture above to take you to my shop on Etsy!

Christmas Snow Globe Journal Handcrafted by Connie Hughes

Christmas Snow Globe Journal Handcrafted by Connie Hughes
This Christmas Snow Globe Journal is just fun to write down Your Holiday Memories, Your Christmas Wishes and More! Now available on my Etsy Shop!

Now Over ONE MILLION PAGE VIEWS!! To All Our Friends, Followers Customers & Visitors Welcome!!

Connie's Spot© Language Translator

Monday, April 13, 2015

Spring Fever Decorating Ideas


"Spring Fever Decorating Ideas"
Right after Christmas my husband and I were shopping at our local
Fred Meyer store and we saw this peacock...this one little purchase has turned
into a big transformation at our house...we both just feel in love
with the bright and vibrant colors...
so I've been busy doing some spring cleaning and decorating... and I've finally finished...
now all I have to do is the upstairs....well I'll do that tomorrow...maybe!
I had to have two!
We have really dark furniture and most of our
accessories were dark as well...so here are some of the simple changes we made
to brighten up our space!
We bought a new rug for the living room...our other rug was very dark...
and so were our pillows
 we got new pillows, new lamps and new wall art...this is the
picture we had up...I live in Washington where it rains almost every day...
so this picture had to go!
This is what we put up to replace it....
I got the set of 3 pictures at Target...
it's light and cheery!
We got these new peacock lamps...they are so pretty...
 at night the shades give off this really pretty soft blue glow...these
lamps I found online at Kirkland's on sale.
On this table and on the wall we had dark brown picture frames...so
we tossed those in the closet...and found this beautiful peacock clock, peacock candles,
the pretty leaf shaped bowl and glass balls at Pier One...
one of my favorite stores...
But my favorite thing is this clock...
my husband bought me the tin peacock on the table...
there's a spot for 3 tea lights.
These peacock candles are so pretty...don't know if
I'll ever light them though!
 Here's another picture we replaced...because it
just screamed fall...

 this one below is just so cheery and very inexpensive...
I got this one at Tuesday Morning!
Out of all the pillows we bought this one is my
favorite...I got all the pillows at Pier One!
 You can change a room with simple little inexpensive touches...I watched
out for specials, sales and clearance items...in the store and online...
the deals are out there...so go and find them...my husband and I
had so much fun shopping for everything...when we were done
it was find of sad...but I've already told him we have the
upstairs to do...with the response I got from him...I think I
had a little more fun shopping then he did!
We had a dark red picture here...we found this one at our Fred Meyer Store...
it too wasn't expensive...the peacock candles were purchased at Pier One!
I found this is a peacock display plate at Pier One as well!
This is the room where I hung my
DIY Easy Wall Hanging Flower Vase Project, that I shared on
my blog...and here's the link!
 We found these peacock plates at Marshall's...
they too were super inexpensive!
I had wine colored drapes in my dining room...so we replaced them for
these pretty plush teal colored ones...I got these at Pier One!
This tin peacock is also from Pier One
 
The weather here is very gloomy and sometimes you won't see the sun
for days...so adding bright and cheery colors to a room
is always a feel good idea!
We are so ready for summer, motorcycle rides and trips to the beach!
I cannot wait for sand, surf and sun!

Happy Decorating!
Connie

Thanks for Supporting Connie's Spot© Sponsors! 

Sunday, April 12, 2015

DIY Easy Wall Hanging Flower Vase Project

"Easy Wall Hanging Flower Vase Project"
Make one for your mom this Mother's Day or for yourself...very easy to do...you
can put flowers in it or a candle...this would look so pretty on a patio or
along a fence with candles...make several for a beautiful
wall grouping!
Here's how and what you'll need:
A raw wooden frame, paint (I chose white because I didn't want my flowers
to have to compete with any color) paint brush and a varnish to seal...
put at least 2 coats of paint on and then varnish.
Once you've found exactly where your going to place the jar...
make 1 mark with a pencil on each side of the jar.
I had my husband drill 1 hole right where each pencil
mark was....
The wire I used was really easy to work with and
really easy to cut...this is the wrapper it came in.
 
Now mount, add some water, ribbon (I chose a turquoise ribbon because that
is my accent color, my husband went to the store and searched all the 
flowers and he couldn't find one blue tulip or any blue flower) 
then get some of mom's favorite flowers or yours...
I love my wall hanging flowers and I hope you will too!
When you tie the ribbon, place it under the wire...
It will help keep the ribbon in place.
Happy Crafting!
Connie
 Thanks for Supporting Connie's Spot© Sponsors!
Give the Gift of Elegance from See's Candies


NEW" Craftsy Beginners Guide to Paper Craft Projects FREE Ebook

Tuesday, April 7, 2015

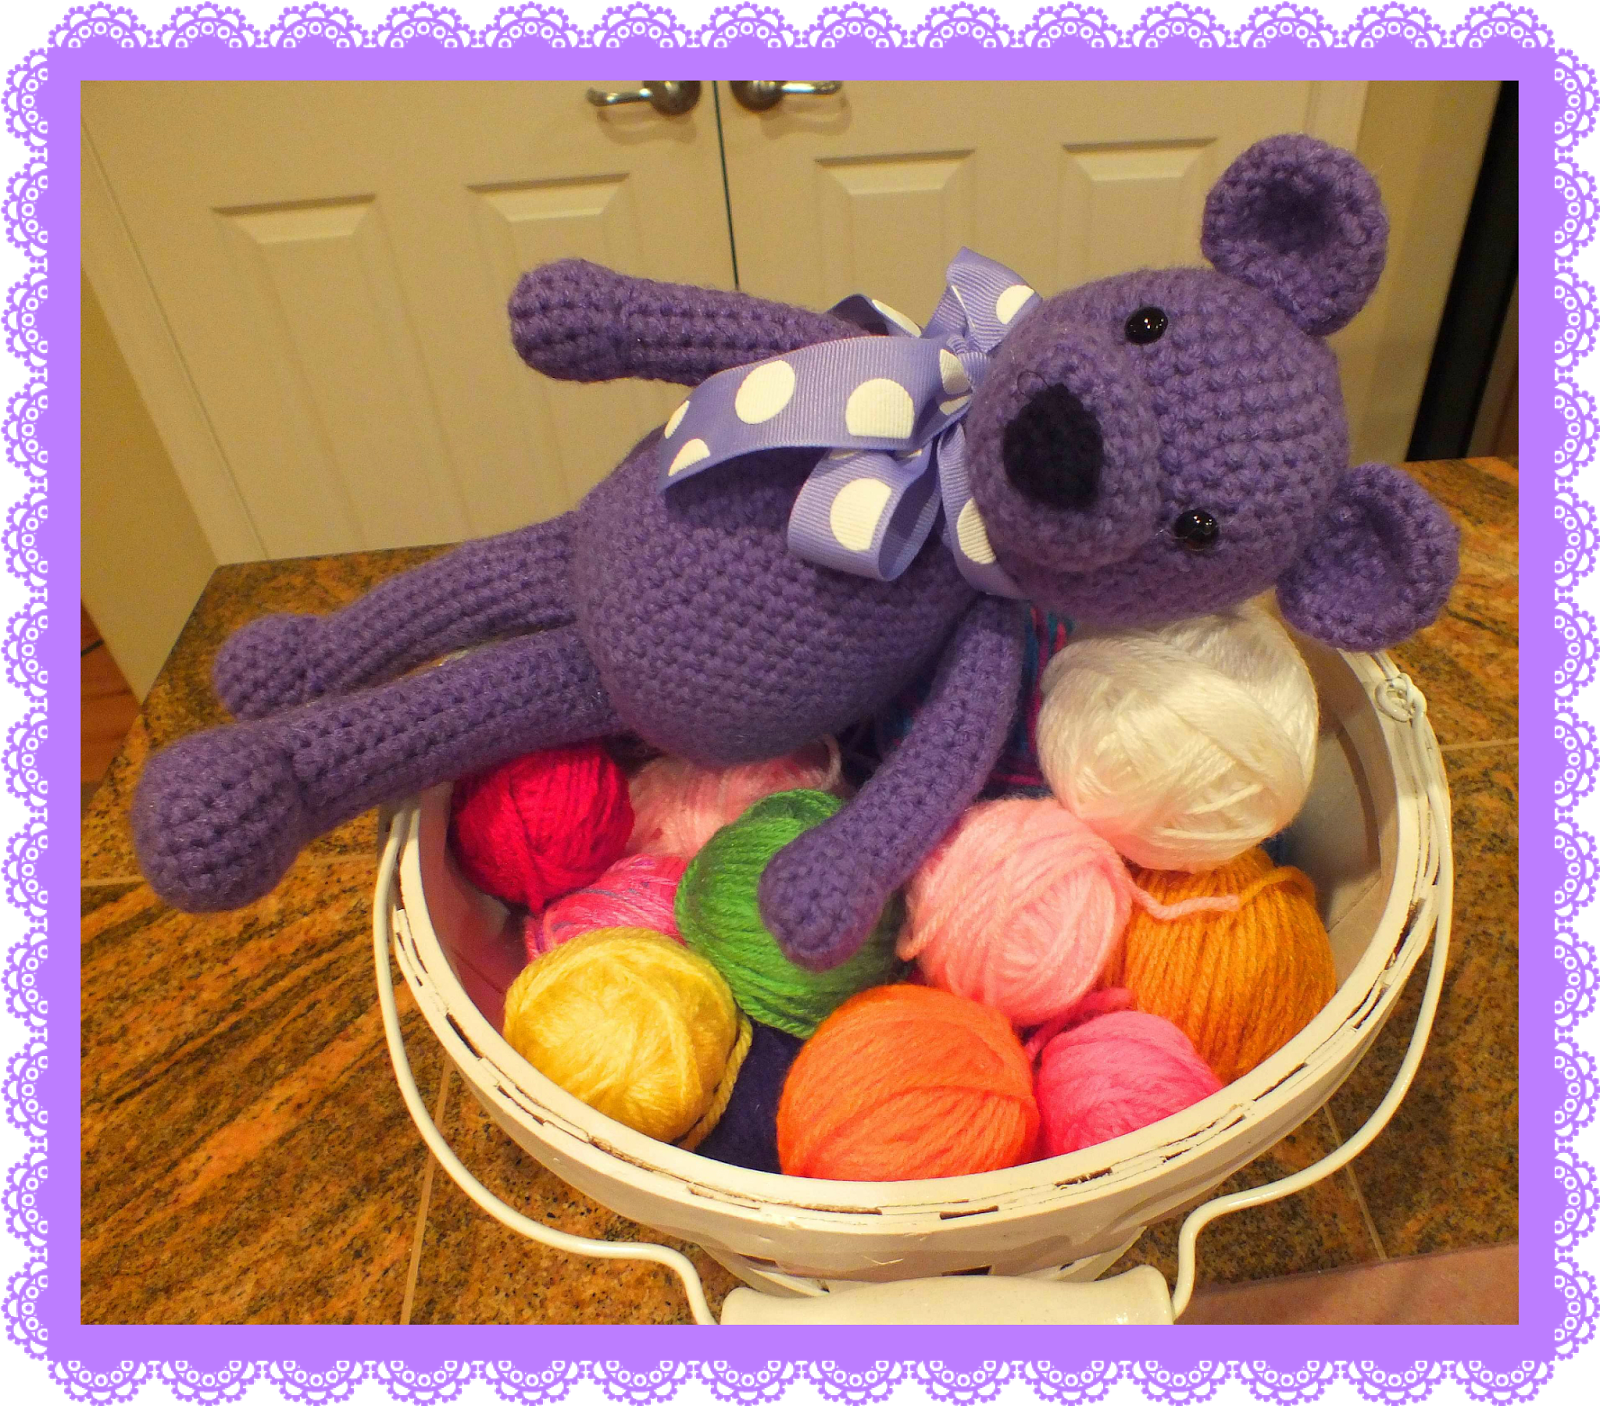
Free Purple Teddy Crochet Pattern©

Free Purple Teddy Crochet Pattern©
By Connie Hughes Designs©

Hello everyone...Here's another cute Free Pattern.
Make this cute Little Bear out of your scraps...its quick & super easy!
(To make the Teddy Bear I used Red Heart Yarn in Lavender, not Purple).
To make Teddy Bear: with Purple & F Hook
The head & body are all one piece
Ch2
Row 1. 6sc in the 2nd st from the hook.
Row 2. 2sc in each st around-12sts.
Row 3. 1sc, 2sc in the next st-18sts.

Row 4. 1sc in 2, 2sc in the next st-24sts.
Row 5. 1sc in 3, 2sc in the next st-30sts.
Row 6. 1sc in 4, 2sc in the next st-36sts.
Row 7. 1sc in each st around -36sts.
Rows 8-15. Repeat row 7
Place eyes in row 10 about 6sts apart
Row 16. 1sc in 4, dec1sc-30sts.
Row 17. 1sc in 3, dec1sc-24sts.
Row 18. 1sc in 2, dec1sc-18sts.
Stuff
Row 19. 1sc, dec1sc-12sts.

To make the Teddy Bears Body:
Row 20. 1sc, 2sc in the next st-18sts.
Row 21. 1sc in 2sts, 2sc in the next st-24sts.
Row 22. 1sc in 3, 2sc in the next st-30sts.
Row 23. 1sc in 4, 2sc in the next st-36sts.
Row 24. 1sc in each st around-36sts.
Rows 25-27. Repeat row 24
Row 28. 1sc in 5, 2sc in the next st-42sts.
Row 29. 1sc in each st-42sts.
Rows 30-32. Repeat row 29
Row 33. 1sc in 6, 2sc in the next st-48sts.
Row 34. 1sc in 48sts.
Rows 35-36. Repeat row 34
Row 37. 1sc in 6, dec1sc-42sts.
Row 38. 1sc in 5, dec1sc-36sts.
Stuff Body as you go
Row 39. 1sc in 4, dec1sc-30sts.
Row 40. 1sc in 3, dec1sc-24sts.
Row 41. 1sc in 2, dec1sc-18sts.
Row 42. 1sc in 1, dec1sc-12sts.
Decrease stitches until closed and FO.

To make the Ears: with Purple & F Hook (make 2)
Ch2
Row 1. 6sc in the 2nd st from the hook.
Row 2. 2sc in each st around-12sts.
Row 3. 1sc, 2sc in the next st-18sts.
Rows 4-6. Repeat row 3
Dec sts until closed and FO.
Sew ears in top of head.

To make the Purple Muzzle: with Purple & F Hook
Ch2
Row 1. 6sc in the 2nd st from the hook.
Row 2. 2sc in each st around-12sts.
Row 3. 1sc, 2sc in the next st-18sts.
Row 4. 1sc in 2, 2sc, 1sc in 4, 2sc, 1sc in 4, 2sc in 2sts, 1sc in 4sts-22sts.
Rows 5-8. 1sc in each st around, FO at the end of row 8.
Stuff muzzle lightly and sew on to the face just under the eyes.

To make the Black Nose: with Black Yarn & D Hook
Ch5
Row 1. 1sc in 4sts, ch1 & turn.
Row 2. Dec1sc, dec1sc, ch1 & turn.
Row 3. Dec1sc and FO.
Sew nose on the muzzle.

To make the Arms: with Purple & F Hook (make 2)
Ch2
Row 1. 6sc in the 2nd st from the hook.
Row 2. 2sc in each st around-12sts.
Rows 3-5. Repeat row 2
Stuff as you go
Row 6. Dec 1sc 3x, 1sc in 8sts.
Rows 7-21. 1sc in 9sts
Row 22. Dec sts until closed and FO.
Sew each are into place.

To make the Legs: with Purple & F Hook (make 2)
Ch2
Row 1. 6sc in the 2nd st from the hook.
Row 2. 2sc in each st around-12sts.
Row 3. 1sc, 2sc in the next st-18sts.
Rows 4-7. 1sc in each st around-18sts.
Row 8. Dec1sc 6x, 1sc in 6sts.
Row 9. 1sc in the FLO in 6sts, 1sc in 6sts.
Stuff as you go, when you get to top part of leg stuff it lightly so the legs bend easily.
Row 10. 1sc in each st-12sts
Rows 11-28. Repeat row 10, ch1.
Row 29. Seal up leg by working 1sc through both sides you should have 6sts, ch1 & turn.
Rows 30-33. 1sc in each st FO at the end of row 33.
Sew legs onto the body, tie a cute ribbon around the neck and you are done!
 Free Purple Teddy Crochet Pattern©
 By Connie Hughes Designs©
This pattern is for personal use.
Do no sell this pattern it is Copyright Protected.
All Rights Reserved.
Connie’s Spot© & Connie Hughes Designs©

I hope you enjoy making this Pattern & who you’re
making it for enjoys it even more!
Happy Crocheting!
Connie

Thanks for Supporting Connie's Spot©!!

Here's Some Of Our Most Popular Easter Patterns !!
The Hopper Bunny Doll Family Crochet Pattern©

The Crochet Pattern Includes The Hopper Bunny Family All 5 Dolls, 
Clothes, Baby Stroller and Baby Bag Pattern©
Instant Digital Download: 1 PDF included
All for Only $3.99  
To Purchase this pattern just click on the link below:

Pippa the Purple Bunny Doll Pattern©
The pattern includes the doll and all the crocheted accessories pictured. 
Plus lots of how to pictures!! 
The Pattern is available for only $2.99 
Instant Digital Download: 1 PDF included
To Purchase this pattern just click on the link below:


Connie's Portable Purple Doll House©
Christmas Gingerbread House© 
Halloween Haunted House Patterns©
Connie's Spot© & Connie Hughes Designs© Pattern Store on Ravelry
Pattern includes All Three Houses Plus All Crochet Accessories & The Doll House Opens Up! All for Only $5.00 Instant Digital Download: 1 PDF included
To Purchase this pattern just click on the link below:


Meet Zoe Girl© & Her Bunny Buddy Jelly Bean©
Zoe Girl and Jelly Bean Bunny Rabbit Crochet Dolls Pattern©
Pattern makes both of these cute dolls and has step by step instructions with lots of pictures! They are both 27" tall...and Jelly Bean© is 30" tall with her ears 
All for Only $2.99 
Instant Digital Download: 1 PDF included
To Purchase this pattern just click on the link below:


Blossom & Blue Bunny Pattern©Blossom & Blue Bunny Pattern©

Thursday, February 5, 2015

Blossom & Blue Bunny Doll Patterns©


Blossom & Blue Bunny Doll Patterns©
By Connie Hughes Designs©
Meet Blossom and her Buddy Blue
"He's the Fastest Carrot in the West"
And they are here in plenty of time for Easter!
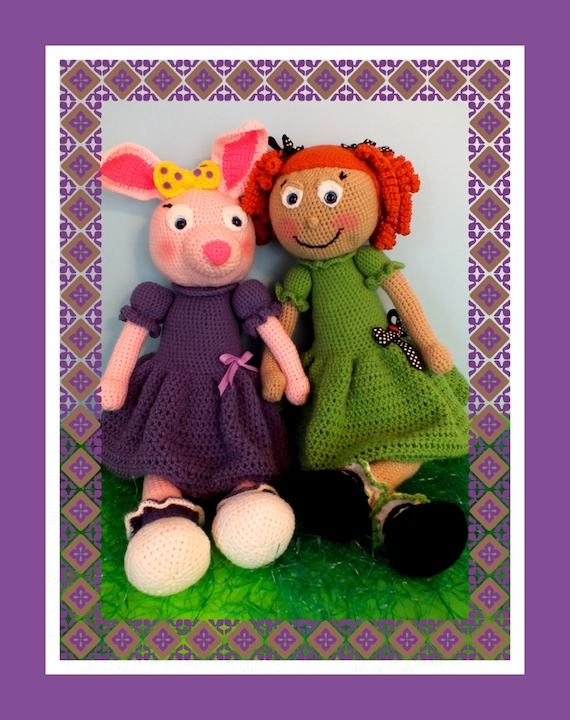
I've had a few people ask me to make something for little boys...
So here's Cowboy Blue Bunny!!
He comes with a hat, scarf, vest and of course black & white cowhide print chaps!
Blossom is sweet and innocent...perfect for that sweet
little girl in your life...she comes with a bonnet, 
sweater & skirt that are loaded with
springtime flowers and her own little
drawstring flower bag!
I made them with Suncatcher Craft Eyes in different eye colors...
one purple and one light blue...just because!
Blossom is 18" tall
This little bag is easy to make and so cute!
Blue is 20" tall
Blue is also wearing a holster and a loaded carrot!

 The Pattern is Available at my shop & the link below:

Thanks for Supporting Connie's Spot© Sponsors!!
LEGO® Juniors: Introduce your child to the world of building.
LEGO® Brand Disney Princess lets your child build fairytale scenes.

Patternworks
Suncatcher Craft Eyes


Make Sure You Check This Out!! Connie's Spot© Blog Post Archive 300+ Posts Loaded With Gems!!!