Welcome to Connie's Spot

The Above Picture is some of Connie's Spot© Crochet Patterns© All Patterns are Available at my Shop on ETSY Welcome to the Multiple Award-Winning Connie's Spot© & Connie Hughes Designs© Crocheting Blog! Check out Connie's New Endeavor Paper Crafting-Journals!! Now in our 12th Year We Want to Thank All Our Customers/Friends Who Have Helped Us Grow with Thousands of Pattern Sales/Downloads, and Over "ONE MILLION PAGE VIEWS" from All Over the World!!!

If you are new to Connie's Spot© make sure to take the time to follow Connie's Spot© Her Patterns are available at her shop on Etsy. Check out Connie's Spot© Blog Archive of 300+Posts!! That includes Free Crochet Patterns from Connie Hughes Designs© Free Recipes, New Paper Crafting-Journals, Decorating Tips, & Poetry!

As always Connie's Spot© is free of Pop-Ups and Invasive Ads...so take your time and explore her blog post archives its loaded with gems...most of all enjoy! Connie's Spot© will receive a small commission if you make a purchase after clicking on the Advertiser/Sponsor Links. This helps cover the cost for providing free patterns! Thanks for Visiting Connie's Spot© Blog!!

Connie's Spot© Crocheting & Connie Hughes Designs© Characters, Photo's, Designs & Patterns are All Copyright© Protected All Rights Reserved.

Shop Connies Spot© and Connie Hughes Designs© Crochet Patterns & Handmade Journals on Etsy!!

Shop Connies Spot© and Connie Hughes Designs© Crochet Patterns & Handmade Journals on Etsy!!
Shop Connie's Spot© and Connie Hughes Designs© Crochet Patterns & Handcrafted Journals on Etsy!! Now Over 1000 Sales of Finished Products & Patterns, Plus Over 100 5-Star Reviews!! To All Our Customers Thank You!!! Just Click on the Picture above to take you to my shop on Etsy!

Christmas Snow Globe Journal Handcrafted by Connie Hughes

Christmas Snow Globe Journal Handcrafted by Connie Hughes
This Christmas Snow Globe Journal is just fun to write down Your Holiday Memories, Your Christmas Wishes and More! Now available on my Etsy Shop!

Now Over ONE MILLION PAGE VIEWS!! To All Our Friends, Followers Customers & Visitors Welcome!!

Connie's Spot© Language Translator

Tuesday, May 6, 2014

Our Weekend On The Oregon Coast

Our weekend on the Oregon Coast...
There isn't much that can beat the amazing Oregon Coast line...it
is truly a thing of beauty...and on a sunny day it's beyond gorgeous!
Our first day was perfect and about 70 degrees...it was heaven!
 You can take a little stroll around and visit all the little shops
that line the street...gifts that are unique or just down right cute...there's salt water taffy,
gourmet chocolates and ice cream.
The picture below is at Depot Bay
Yaquina Head is a historic lighthouse first lit August 20, 1873...
the grounds the lighthouse sits on is just beautiful.
The lighthouse has a spiral stair case that winds it's
way all the way to the top of the light.
 
Thankfully at the Lighthouse there is a fence
that goes all the way around the rocky cliffs below...also below
are hundreds of sea lions that call these coastal waters home...
but they are not alone.
Also here on top of these rocks and in the waters below,
thousands of birds gather...the sound they make is unbelievable!
 Truly there are thousands of birds
One of my favorite places was this shop...and even though
Christmas is far off...you couldn't keep me out of here!
If you've followed my blog, you know I love
 Byer's Choice Dolls
and what I found was the biggest selection of in stock dolls
that I've ever seen...so I just had to have one...and my husband
being his sweet and loving self bought one for me!
And they have so much more Connie's Spot© Highly Recommends!!
Here's their website: http://www.christmascottage.net/
 The ladies who worked there were super nice and made it
a lot of fun to visit...will go again soon!
"No Sales Tax"
 The next day, the weather had turned on us...but we drove to Newport...
which is only a few miles from Lincoln City...
we decided to visit the Aquarium
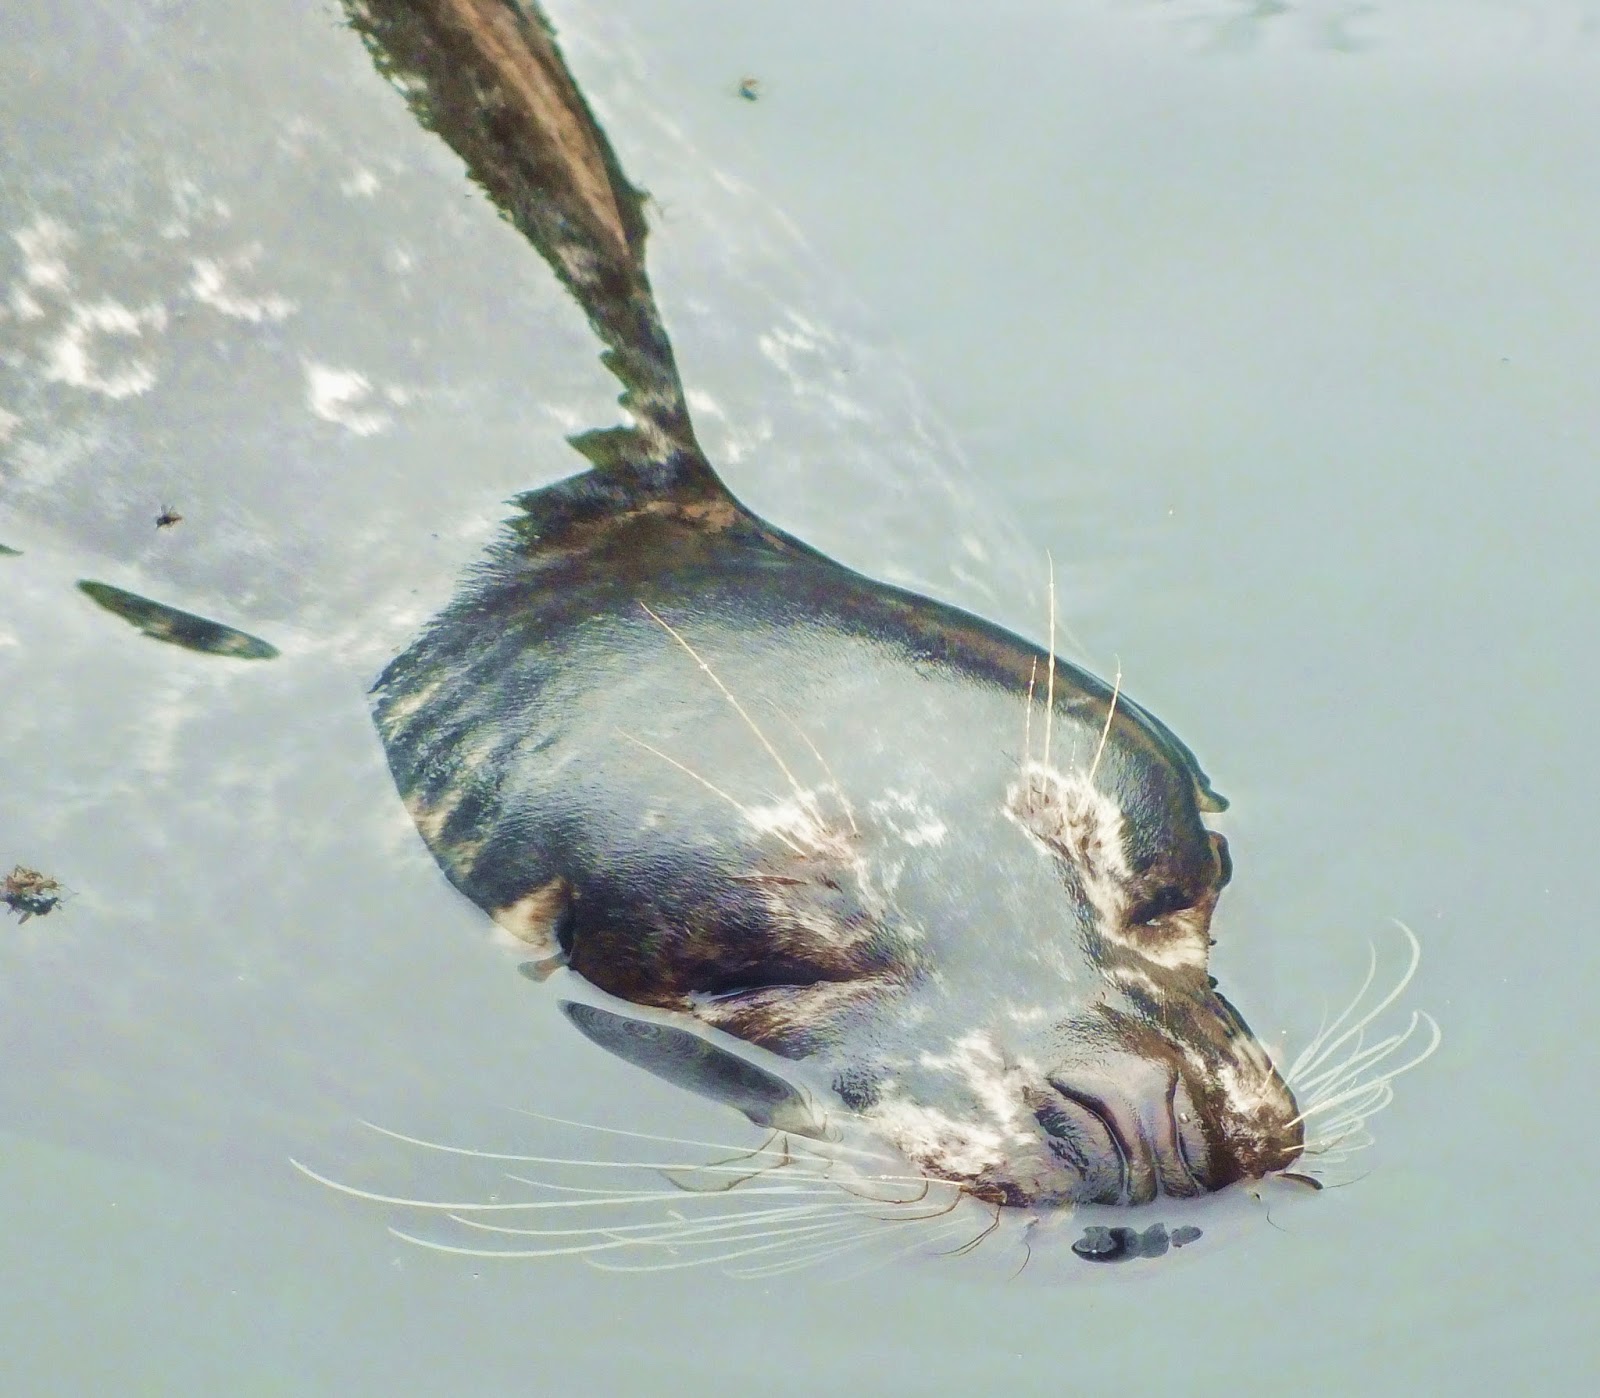
Here sea lions and seals swim and play...they are quite friendly...
almost swimming right up to you...


They seem very happy just swimming around and
at times it seems they almost pose for the camera.

 
The indoor exhibits, I must say was my favorite...take
a look at a few of the pictures below...and you'll
see what I mean.
These guys were in a giant fish tank.

We used a flash on our
camera and every time we took a picture it would move...
so I don't think it liked our light.

Soon you find yourself heading into the deep...where
sharks and string rays live...
and honestly seeing this guy
coming right at you is a little scary...
 
They just swim all around you...it's the closest I ever
want to come to a shark.


The birds were so cute!
 
They too would come very close to you!
 The Pacific Coast Vulture
 
 This is in Newport right by the Aquarium!
 
This was a fun museum to visit
it has all kinds of weird things to see...the kids will love it...
here you can stroll the shops and the prices are right
to buy souvenirs for the kiddies!
The next day, weather wise it wasn't much better...it fact it poured...
so we decided to visit a place that we had driven by before
but never stopped to see so this time we did..
The Tillamook Creamery
It's free to get in...and they have observation windows
that allow the visitors to look down and see part of
the factory...they have cheese samples galore.
And wonderful gift shops...and all kinds of food from
all over the Pacific Northwest and beyond.
Everything was so good and the
Huckleberry Vinaigrette I bought was fantastic!


This was one of the beautiful sunsets...we had gone to
dinner and forgot to get the camera...so this was taken with
my husbands iPhone!
There are lots of things to do along the Oregon Coast...there are the
Sea Lion Caves in Florence, Helicopter rides in Sea Side which
our family did one year...if you love the ocean and are close to
Oregon come and see the 20 Miracle Miles...and so much more!
Connie

Monday, April 28, 2014

Pink Teddy Bear Granny Circle Security Blanket©

Pink Teddy Bear Granny Circle Security Blanket©
By Connie Hughes Designs©
I had to make one in pink for my little Gwinna Bear :-)
I've put the link for this free pattern below!


I used Red Heart Pretty In Pink Yarn!
Perfect baby shower gift!
To make the trim around the neck and the bottom of
the pink one...with a D hook I:
ch3, sk 1 st, 1sc, repeat all the way around neck
and bottom of blanket!
Here is the link is for the pattern...
http://spotconnie.blogspot.com/2014/04/free-teddy-bear-granny-circle-security.html

You can order a completed one at Connie's Spot© Shop on Etsy!
https://www.etsy.com/listing/187985316/pink-teddy-bear-granny-circle-security
 
Thanks for Supporting Connie's Spot Sponsors!
Suncatcher Craft Eyes
 

Tea Cup Pin Cushion


"Tea Cup Pin Cushion"
I love my tea cups...and I love looking at them but I only get to
see them when I'm sipping tea...and in warm weather
that isn't to often...so I turned my smallest tea cup
into an adorable pin cushion!
Now I can look at any time I want to...and it looks 
so pretty sitting in my work space!
Super simple to make and beautiful to look at!
Take some poly fill and wrap some pretty fabric around it,
stuff inside your favorite tea cup...that's it!

Saturday, April 26, 2014

Free Teddy Bear Granny Circle Security Blanket Pattern©

"Free Teddy Bear Granny Circle Security Blanket Pattern©"
Another Free Pattern by Connie Hughes Designs©
Super easy and a quick project to make...Plus you
could make place mats, doilies, a table runner or a center piece.
Perfect for toddlers!


I really love to crochet the granny circle…it’s very easy once you get the hang of it…I’ve written out for the Teddy Bear Security Blanket pattern to share with you for free…it includes how to make the bear and of course the circle.

I hope you like it and please feel free to sell your made products from this pattern…just please don’t sell the pattern.

Materials used:
Red Heart Yarn in
1 Roll of Light Blue
Suncatcher Craft Eyes 12mm
1 Roll of White
Needle & Matching Thread
Poly-Fill

Hook Sizes:
I, F, C or D

To make the Teddy Bear head with an F hook and Light Blue yarn
Ch2
Row 1. Wk 6sc in the second st from the hook.
Row 2. 2sc in each st, around-12sts.
Row 3. 1sc in the next, 2sc in the next st around-18sts.
Row 4. 1sc in 2, 2sc in the next st, around-24sts.
Row 5. 1sc in 3 sts, 2sc in the next, around-30sts.
Row 6. 1sc in 4, 2sc in the next st, around-36sts.
Row 7. 1sc in 5, 2sc in the next, around-42sts.
Rows 8-19. 1sc in each st, around-42sts,
Row 20. 1sc in 2 sts, dec1, around-28sts.
Row 21. 1sc, dec1 all the way around.
If using safety eyes stuff and put them in and position them around row 10 from the top. Take out the stuffing and put the washer in to secure the eyes.
Continue to row 22.
Row 22. Continue to dec your sts, until closed and FO.


For the body with an F hook
Repeat rows 1 through 6 of the head
Row 7. 1sc in each st around-36sts.
Rows 8-15. Repeat row 7
Row 16. 1sc in the next 2 sts, dec1-around, stuff and continue decreasing until closed.

To make the ears (make 2) with an F hook
Ch2
Row 1. 6sc in the second st from the hook.
Row 2. 2sc in each st-12sts.
Rows 3-4. 1sc in 12sts.
Row 5. 1sc in 5, 2sc in the next, 1sc in 5, 2sc-14sts.
Row 6. 1sc in 14 sts and FO.
Sew to the top of head.

To make the White collar with an F hook
Make a ch long enough to go around the neck area.
Wk 3dc into each ch space, all the way down ch1 & turn.
Wk 1dc in each st across and FO.
Sew it around neck.
 
To make the muzzle with an F hook
Ch2
Row 1. Wk 6sc in the second st from the hook.
Row 2. 2sc in each st around-12sts.
Row 3. 2sc in the next 2 sts, 1scin the next, 2sc,1sc in next 2sts, 2sc in 2, 1sc in the next 4sts.
Row 4. 1sc in 2, 2sc in the next 2, 1sc in the next 2 sts, 2sc in 2, 1sc in 3, 2sc in the next 2 sts, 1sc in 4 sts.
Row 5. 1sc in each st, around.
Row 6. Wk 1sc in each st, 1sl st and FO.
Sew part to the face area, stuff very lightly sew the rest of the way.

To make the little black nose with a C or D hook
Ch6
Row1. 1sc in 5 sts, ch1 & turn.
Row 2. Repeat row 5, ch1 & turn.
Row 3. dec1, 1sc, dec1, ch1 & turn.
Row 4. dec1, 1sc, ch1 & turn.
Row 5. Dec1 and FO.
Sew onto the muzzle.
To make the arms with F hook (make 2)


Ch2
Row 1. 6sc in the second st from the hook.
Row 2. 2sc in each st around-12sts.
Row 3. 1sc, 2sc in the next st, around-18sts.
Rows 4-8. 1sc in 18sts.
Row 9. 1sc, dec1, around-12sts.
Row 10. 1sc in each st, around.
Row 11. Wk 1sc in FlO all the way around.
Rows 12-23. 1sc in each st and FO.

To make the Blanket part with an I hook
Ch3
(in this pattern ch3 counts for the first st)
Row 1. Wk 11dc in the second ch st from the hook, (you will have 12sts) join & ch3.
Row 2. Wk 2dc in each st, ch1, repeat all the way around join with a sl st, sl st to the next ch1 space and ch3.
Row 3. 2dc in each ch space, ch1 repeat all the way around, join with a sl st and sl st to the next ch1 space and ch3.
Row 4. 3dc in each ch space, ch1, repeat all the way around (you will always join with a sl st and then sl st your way to the next ch1 space unless instructed).
Row 5. Wk 2dc in the next space, ch1 and wk 2 more dc in the same space, ch1, and repeat all the way around, ch3.
Row 6. Wk 2dc in the next space, ch1, wk 3dc, ch1, repeat and ch3.
Row 7. Wk 3dc, ch1, 3dc, repeat, (remembering to st st to next ch1 space) ch3.
Row 8. Wk 4dc in the next space, ch1, repeat all the way around, ch3.
Row 9. Wk 2dc, ch1, wk 2dc in the same space, repeat and ch3.
Row 10. Wk 3dc in the next ch1 space, ch1, wk 2dc in the next space, repeat and ch3.
Row 11. Wk 2dc in the next ch space, ch1, repeat all the way around and ch3.
Rows 12-15. Wk 3dc in each space, ch1, repeat and ch3.
Row 16. Wk 2dc in the next space, ch1, wk 2dc, ch1, wk 2dc in the same space all the way around and FO.

To make the ruffle change to White
Row 1. wk 1sc in each st and even the ch1 space, around, join and ch3.
Row 2. Wk 3dc in each st around, ch3 & turn..
Row 3. Wk 1dc in each st around and FO.
Now sew teddy to the center of the blanket.


Free Pattern by Connie Hughes Designs©
This pattern is for personal use.

Teddy Bear Granny Circle Security Blanket Pattern©
it is Copyright Protected.
All Rights Reserved.
Connie Hughes Designs© & Connie’s Spot©
  I hope you enjoy making this Pattern & who you’re
making it for enjoys it even more!

Happy Crocheting!!
Connie


Thanks For Supporting Connie's Spot© Sponsors!


Thursday, April 24, 2014

The Twinkle Toe Trio Crochet Doll Pattern©

Meet The Twinkle Toe Trio©
By Connie Hughes Designs©
Here's the trio of ballerina friends...
Lily Ballerina© Candy Ballerina© Lucy Ballerina©
All 3 Completed Dolls where made with Suncatcher Craft Eyes!
As always I try hard to make my patterns very affordable...
Plus this 1 Pattern Makes All 3 Ballerina's for only $2.49!!
Meet Lily Ballerina©
She loves to sit on her Lily Pad
and dance Ballet!
 She has the biggest smile of all...
Here's prim & proper Candy Ballerina©
 she's a little reserved.
She loves to twirl
 There's only one thing she loves more than
the dance...
Her very best friends
Here's Lucy Ballerina© she is very shy
Everyone loves her big blue eyes
She loves to dance and hang out with friends!
Especially her best friends!
The Pattern for All Three Dolls is at Connie's Spot© Shop here's the link:
 

Make Sure You Check This Out!! Connie's Spot© Blog Post Archive 300+ Posts Loaded With Gems!!!